Bald Eagle Craft with Free Printable Template
Looking for a cute bald eagle craft?
We have a great one for you today! This little bald eagle sewing craft is simple and easy enough that older kids would have fun making these.
You can use this little guy as a DIY felt ornament or as an independence day craft!
All you need is some craft felt, a need and thread and something to fill your craft with and of course, our free printable bald eagle template will help!
Table of Contents
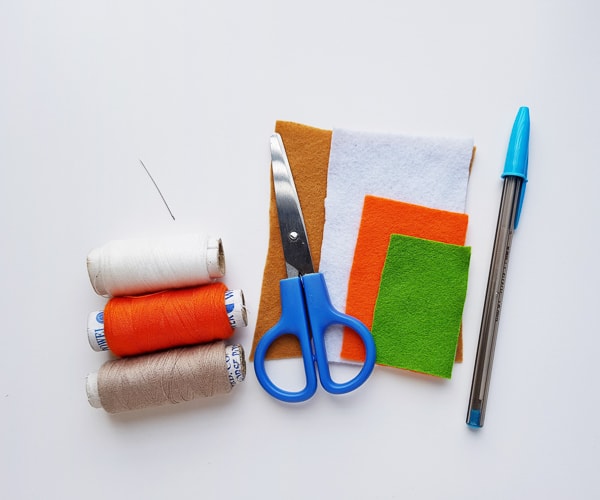
Supplies for Your Bald Eagle Felt Craft
- Felt Craft fabric
- Pencil or fabric marker
- Scissors
- Needle and thread
- Cotton or scrap felt as filler for your bald eagle
- Bald Eagle Craft Template
How to Make Your Felt Bald Eagle
Here we’ll show you step by step how to make your felt bald eagle craft. Make sure to grab the downloadable template from our free craft library.
Once you download and print it out, you’re ready to grab the rest of your supplies and get started!
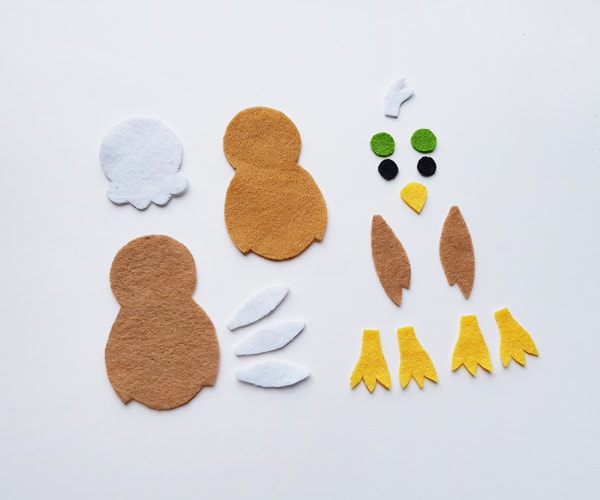
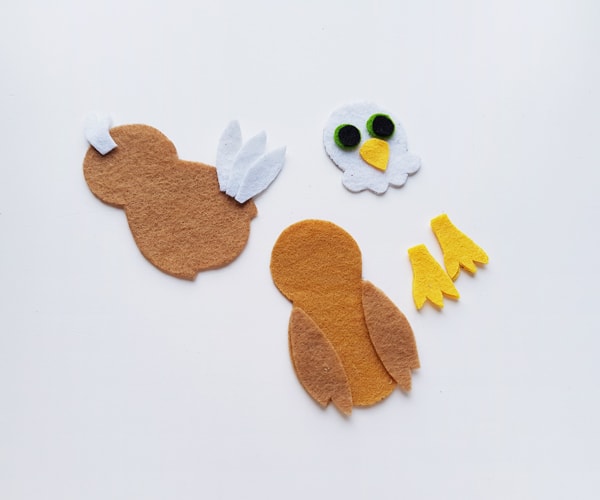
Step 1: Prep your Eagle Pieces
Grab your felt fabrics. To make your bald eagle look like ours, you’ll need black, white, green, yellow and brown felt.
Cut out your eagle template pieces and trace them onto your felt with your fabric marker. You could also pin them to your felts and cut around the templates instead.
Our Bald Eagle template includes 2 body pieces, 3 tail feathers, 2 big circles and 2 smaller circles to make your eagles eyes, 1 beak pattern, 4 leg pieces (2 for each leg), 1 crown feather pattern, 1 upper body (head) piece and 2 wing pieces.
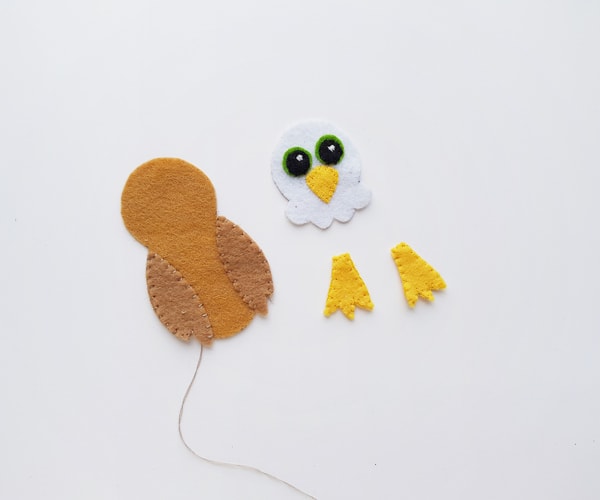
Step 2: Make Your Eagles Body
Grab one of your body pieces and place the 2 wing pieces on both sides of it. Then place 2 leg pieces together.
Take the eagles upper body pattern (the head) and place the eyes and beak patterns on it appropriately.
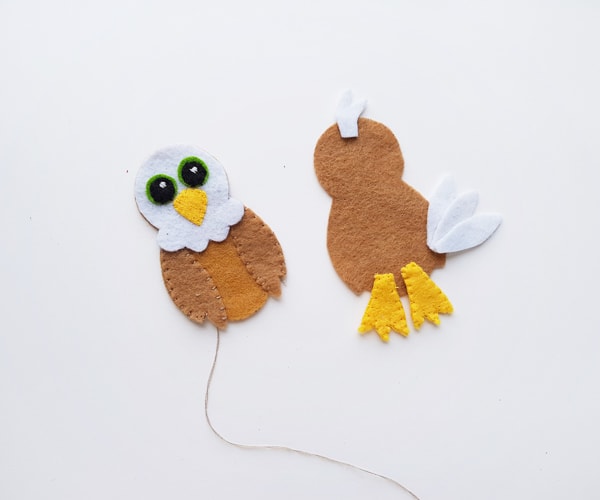
Take your second body piece (This will be the eagles back) And place your tail feathers and head feather in the right spots.
You can use the picture below to see what I mean.
Step 3: Start Sewing
Prepare needle and thread (making sure that the thread matches the felt to stitch). Stitch the patterns placed together in previous step around their sides to join them.
Step 4: Finish the Front of the Eagle
Now take the finished headpiece and place it on the wing stitched body pattern, on the top side.
This is the front side of the bald eagle.
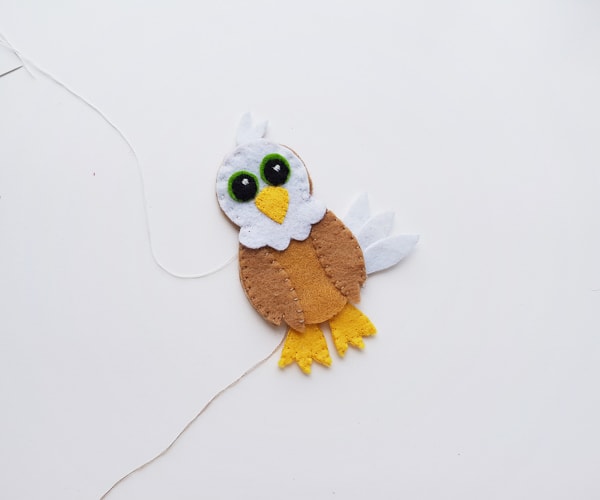
Step 5: Sew Your Head to the Body
Now carefully place the headpiece on the top of the front body piece carefully. Stitch it to your eagle body.
While stitching around the sides make sure to tack down each item to attach them all together with the body pattern.
Grab your back piece and line it up with the front of your eagle. Make sure the “right side” of both pieces are facing out.
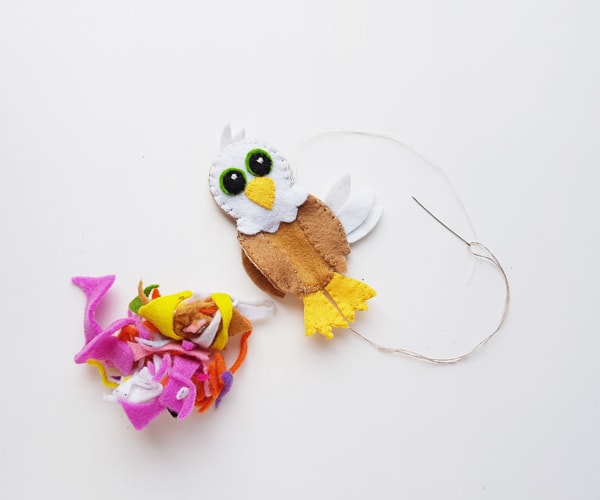
Step 6: Stuff Your Bald Eagle
Before completely closing the side of your eagle together, stop stitching and leave a small opening. Use scrap pieces of felt or cotton balls to stuff the felt eagle through the small opening.
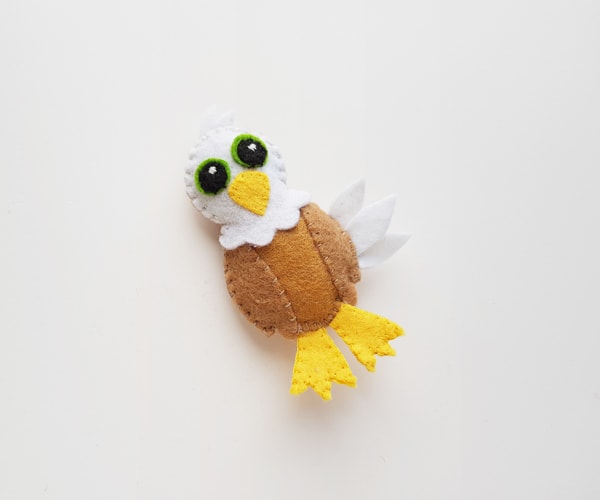
Step 7: Close Your Eagle
Once you are done stuffing your bird, close the opening with a few stitches. Tie a good knot and draw the needle inside the plush. Draw the needle back out and cut off extra thread.
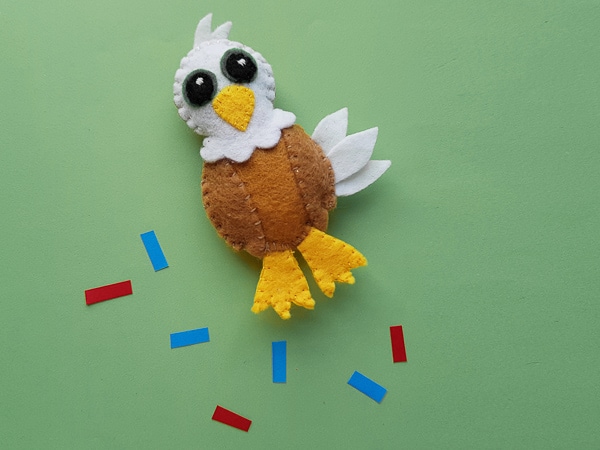
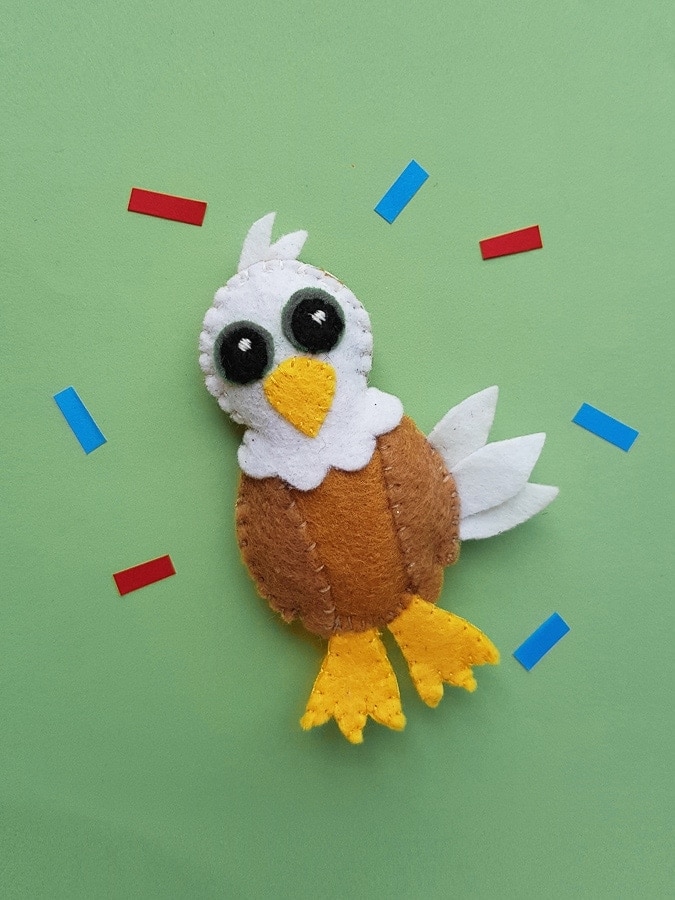
Step 8: Admire Your Work
Step back and admire your adorable bald eagle craft!

Bald Eagle Craft with Free Printable Template
This adorable bald eagle craft can easily be made with just felt, a needle and some thread!
Materials
- Felt fabric
- Cotton or scrap felt
Tools
- Scissors
- Needle and thread
- Pencil or fabric marker
Notes
- Select felts for the project. We used black, white, yellow, green and brown felt for our eagle. Print out your eagle templates and cut out all the pieces.
- Take any one of the body pieces and place the 2 wing pieces on both sides of it. This will be the front piece of your bird. Match up your leg patters. Take the upper body pattern (the eagles head) and place the eyes and beak pieces on it to make your eagles face.
- Stitch the patterns placed together in previous step around their sides to join them.
- Now take the finished head piece and place it on the wing stitched body pattern, on the top side. Also grab the other body piece (the back) and place the 3 tail feathers on any one side (bottom left or bottom right) and place he crown feather on the top side (the head part).
- Carefully place the front eagle piece on back one. Prepare needle and thread to stitch around the side.
- Before closing the side stitch stop stitching by keeping a small opening. Use pieces of scrap felt or a few cotton ball to stuff the felt eagle through the opening.
- Once you are done stuffing, close the opening with a few stitchs. Tie a knot and draw the needle inside the plush. Draw the needle back out and cut off any extra thread.