Rainbow Rice Recipe: Perfect for Sensory Bins
Today we are showing you how to make rainbow rice! This makes an awesome sensory bin activity. In this post, we are taking you through a step by step tutorial for making your own rainbow colored rice.
My kids love sensory bins and sensory activities! So many new textures and things to feel, do and experience.
Some bins are a total hit, and today’s rainbow rice bin was no exception!
In fact, my oldest son is somewhat obsessed with rainbows.
He loves creating amazing art with our rainbow templates and we even crafted a rainbow paper plate fish.
So a rainbow rice sensory bin only made sense.
His favorite part of the whole activity though was dyeing the rice with the food coloring!
Dyeing the rice sounds a little complicated, but it’s actually pretty easy and so much fun. Here’s a step by step tutorial on how you and the kiddos can make your own rainbow rice!
Table of Contents
Benefits of Sensory Bins for Kids
If you haven’t heard of all the great benefits of sensory bins for kids, there are a ton!
They are great for toddlers, preschoolers and any kids who have sensory issues.
It’s great for their hand eye coordination, fine motor skills, and encourages creative play. Plus sensory play is just plain fun!
Plus it helps keep little ones busy, letting mama doing other things.
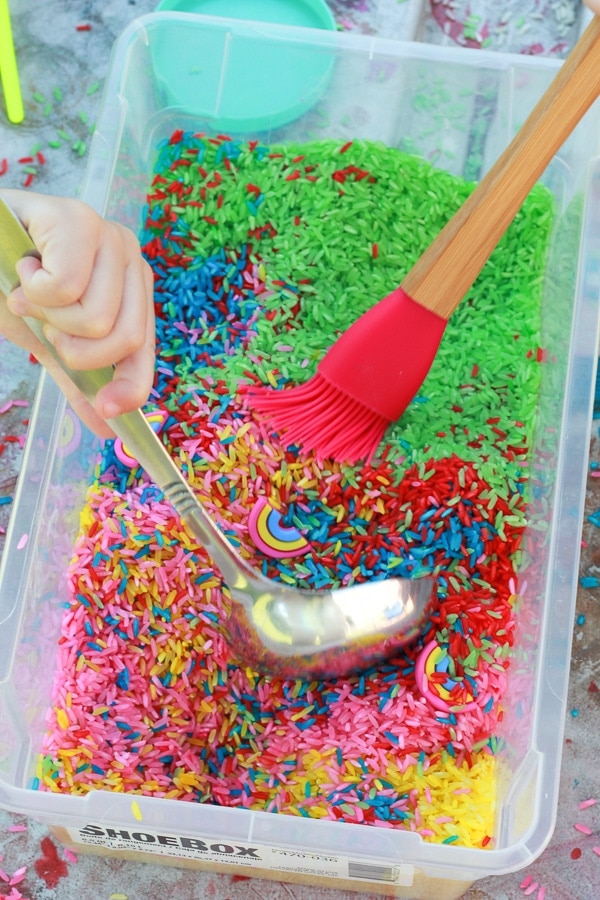
Supplies Needed for Rainbow Rice
Uncooked White Rice: Plain rice is best here. Do not cook the rice, you want uncooked rice! We used about 2 cups of rice for each color, so 10 cups total for our bin
Mason Jars: We used mason jars to shake our rice and mix the food dye in. But plastic bags would work great too!
Food Coloring: Necessary for colored rice! I think the gel food coloring works best here. You’ll need a variety of rainbow colors: we used red, blue, yellow, green and hot pink.
Rubbing Alcohol: You’ll need about 1 Tablespoon for each color of rice you’re making. Although other alcohol (like Vodka) would totally work (Since we had 5 colors, we used 5 Tablespoons) This just helps the color stick to the rice.
You’ll also need things like measuring cups and measuring spoons. Which can totally be added to your play bins afterward!
Supplies Needed for the Sensory Bin
- Bin to play with rice in
- Tools to move around the rice
- Extra toys (we used little rainbow buttons for added intrest)
How to Make the Rainbow Rice
Now we’ll show you how to make this rainbow rice using food dye and just a bit of rubbing alcohol, although any alcohol will work.
Step 1: Gathering the Rice and Dyeing Supplies
Start by gathering your supplies to dye the rainbow rice.
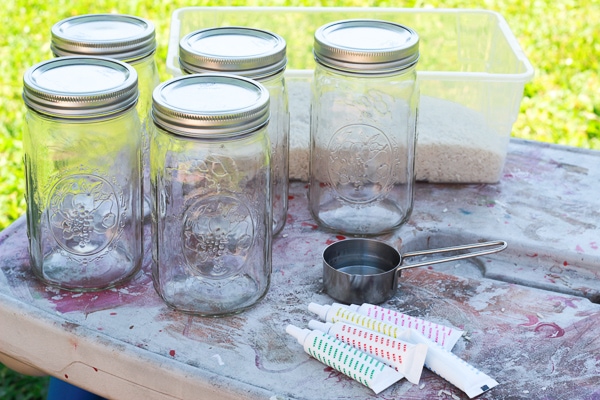
Step 2: Divide the Rice
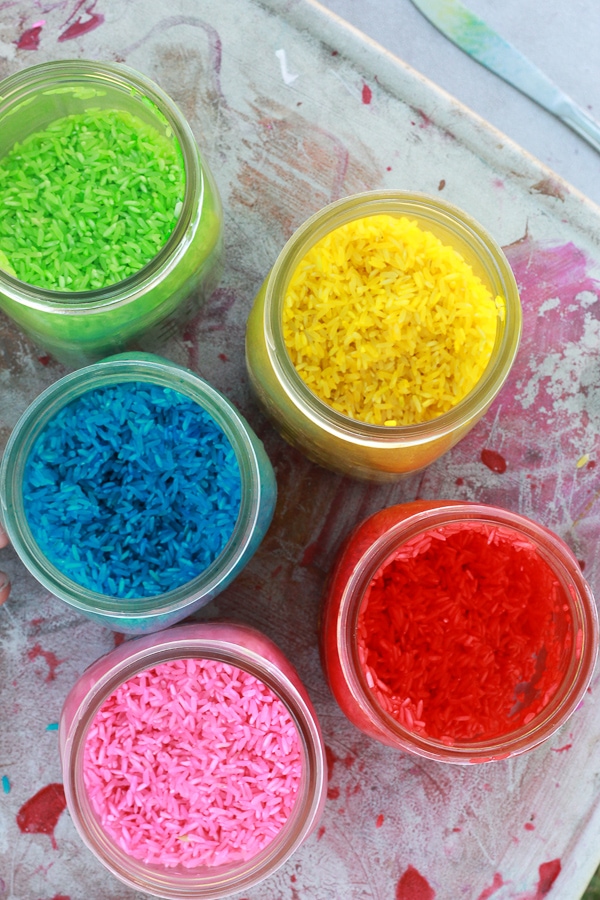
Separate and place the white rice into different mason jars. We split ours between 5 different jars, one for each of our different colors.
We loosely measured, but we put about 2 cups of rice in each jar.
This part the kids can help with too!
If you aren’t using jars, this is where you’d divide the rice into 5 different Ziploc bags large enough to comfortably hold the rice but let it move freely to mix the colors.
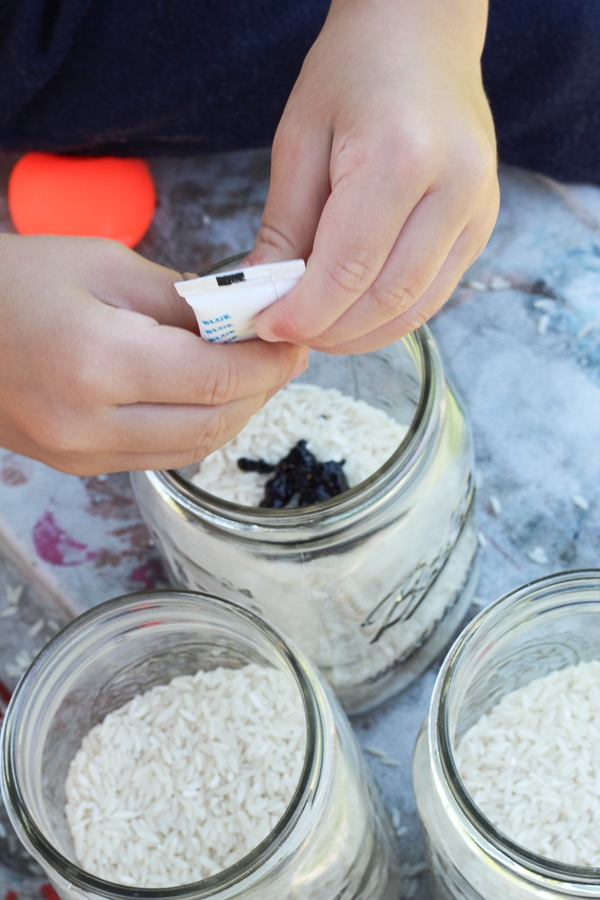
Step 3: Dye Rice
Now that you have all of your rice separated into the jars, it’s time to dye the rice with the food coloring.
Simply add one color of food dye to each of your jars. We used a “good squeeze” to measure our our food coloring.
So you’ll be adding green to one jar, yellow to another, etc, until each of the jars have both the rice and food dye in them.
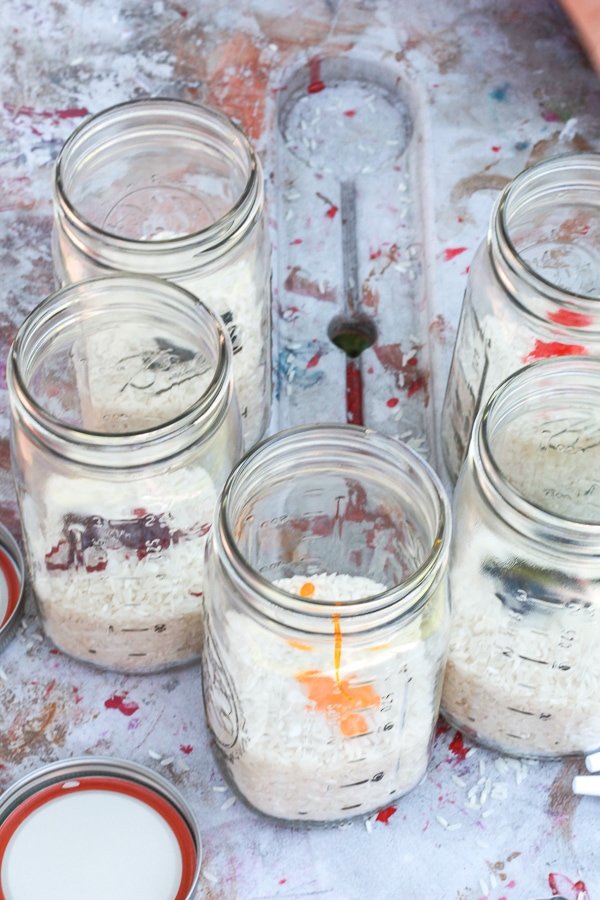
Step 4: Add the Rubbing Alcohol
Now add 1 tablespoon of the rubbing alcohol to each jar.
The alcohol will help spread the dye evenly around the rice. Don’t worry about the alcohol affecting the kids!
It disappears and evaporates once the rice fully dries.
Step 5: Cap and Shake the Jars
Now you can cap each of the jars and shake like crazy to evenly color all of your rice.
A lot of shaking is necessary! But the kids loved this part. Who knew that dyeing rice could be so fun.
You may even have to stir the jars a bit to break up any large clumps of food coloring.
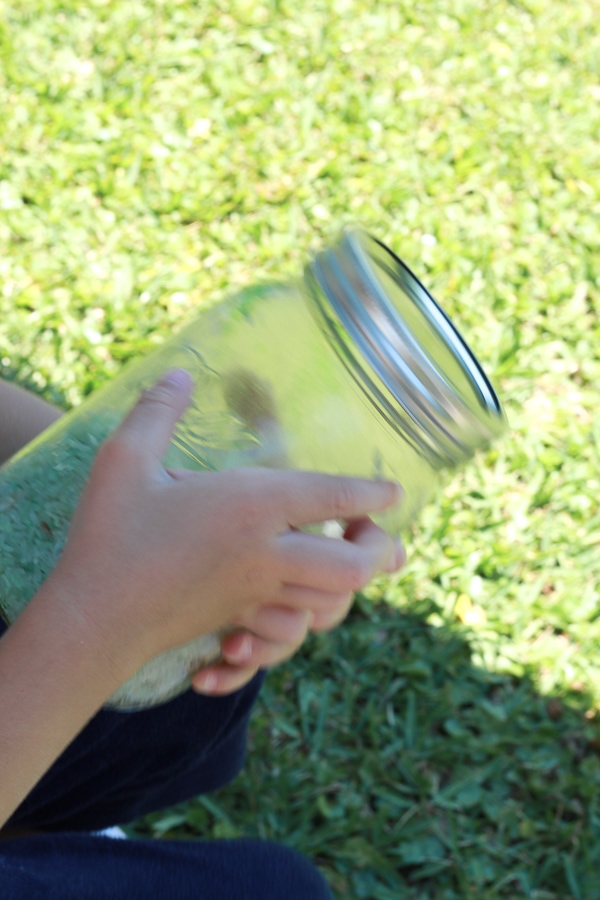
This is a blurry photo of my oldest shaking the rice. This part really wore him out!
Of course, this part should be done by an adult, or a child old enough to understand how to handle glass safely.
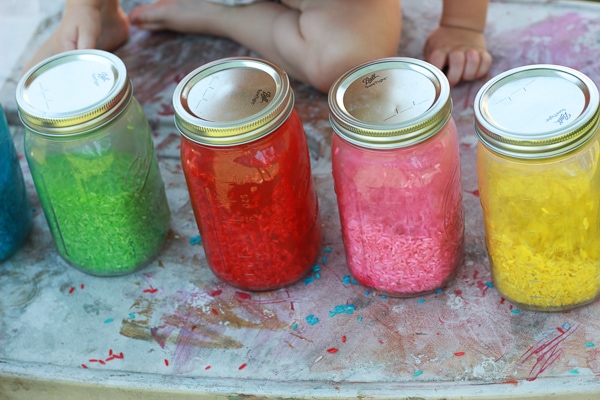
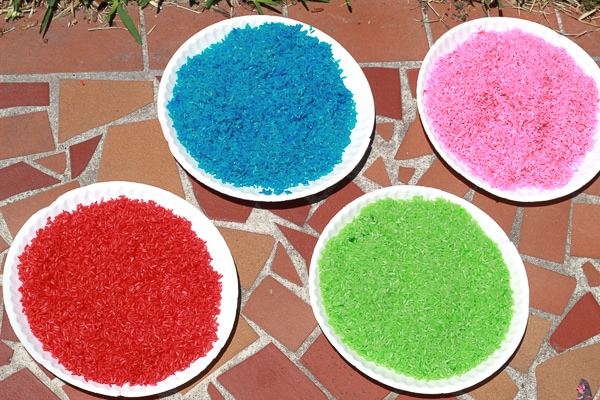
Step 6: Drying the Rainbow Rice
Place each color of your rice to dry on a different surface. We used paper plates but a baking sheet would work great too!
If it’s a sunny day, the heat from the sun will help it dry very quickly.
Give the rice a gentle occasional stir to help the drying process.
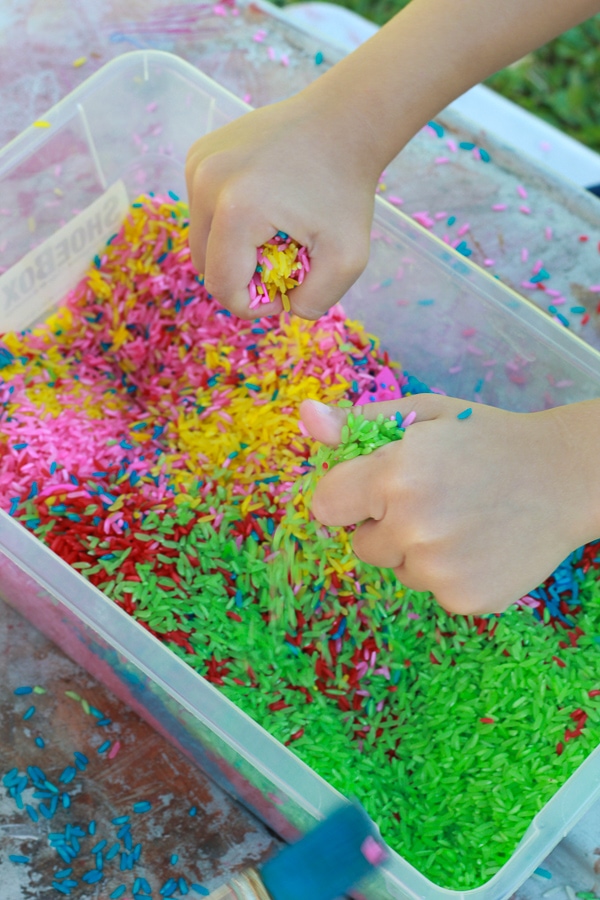
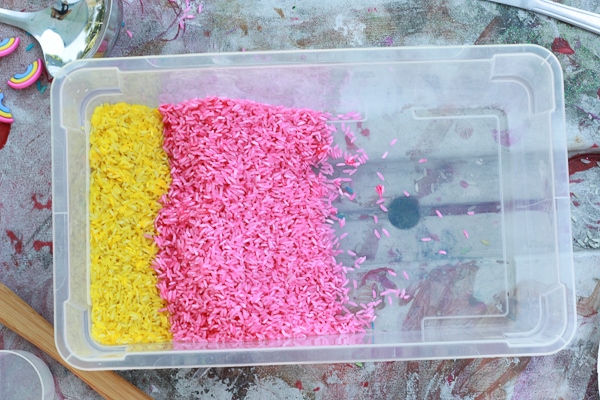
Step 6: Add the Rainbow Rice to the Sensory Bins
Once the rice is totally dry, now it’s time for the good part!
Adding the rice to the sensory bin!
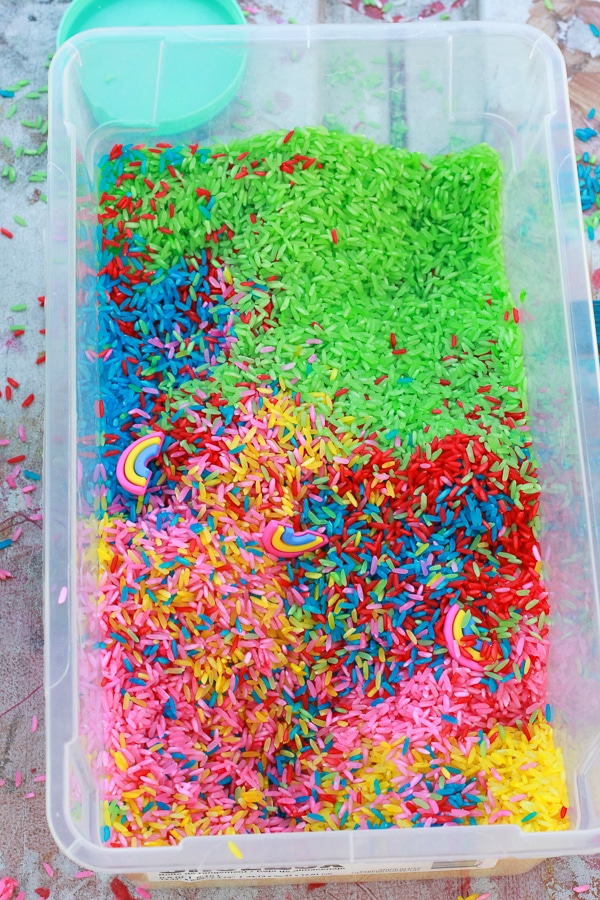
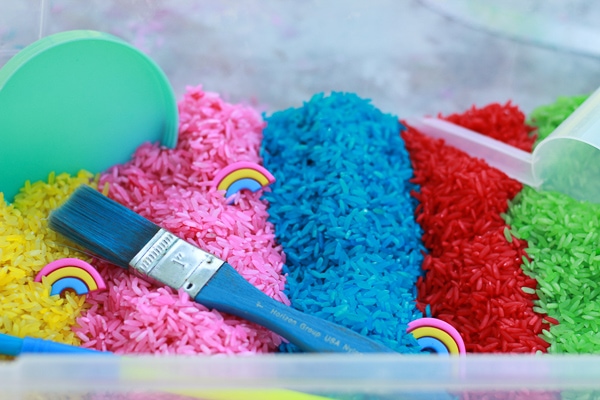
For a fun effect, we layered our rainbow rice into colored layers.
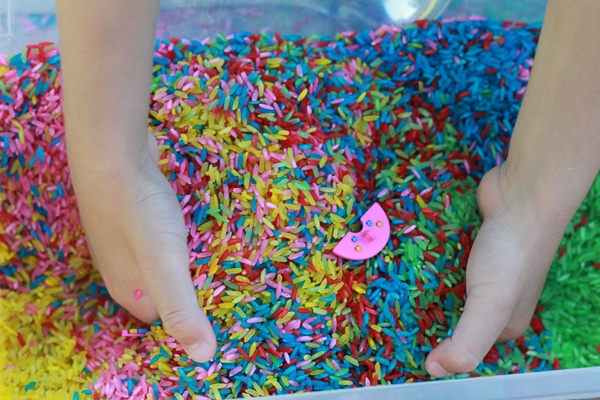
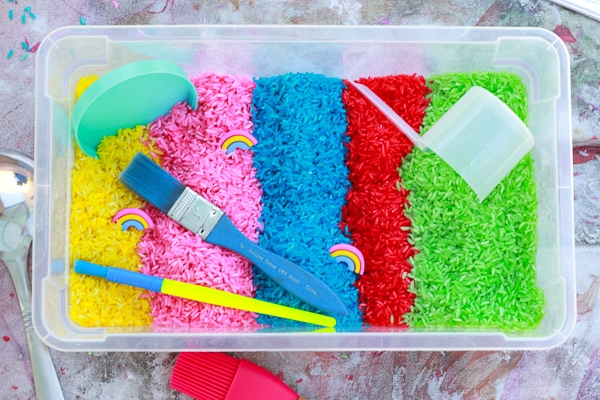
Setting up the Rainbow Rice Sensory Bins
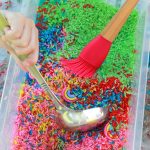
Setting up a rainbow rice sensory bin is fun and takes nearly nothing once it’s got all the fun colored rice in it!
Things we added to our rainbow rice sensory bin:
- A large spoon
- A bright silicone brush
- Paintbrush
- A few rainbow buttons we had on hand
- A measuring cup
Other Items You Could Add to the Rainbow Rice Bins
Don’t feel limited on what you can add to the rainbow rice bins! Other neat items that would encourage sensory play
- Small funnels
- Small jars
- Toy cars
- Blocks or Legos