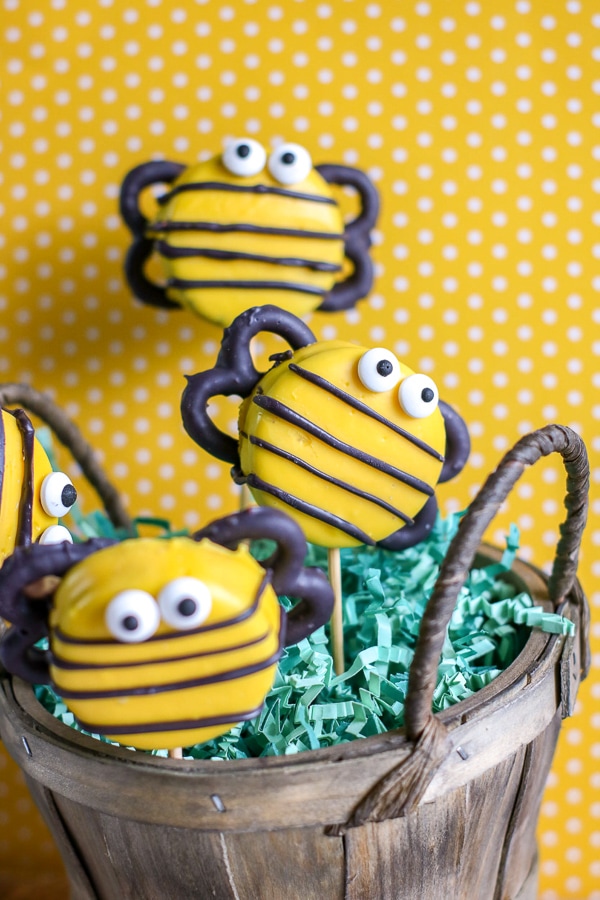
Oreo Bumble Bee Cookies
Are you looking for some cute cookies to go with a bee themed party?
We’ve got an adorable tutorial for you then! Oreo bumble bee cookies!
These are made with Oreo cookies, pretzels and candy melts. These make adorable oreo pops when you put them on a stick, but it’s up to you how you want to present them.
Here’s we’ll show you how to make your own bumble bee cookies step by step.
Table of Contents
Supplies needed for Bumble Bee Cookies
To make these cute bee cookies you’ll need:
- 1 pack of Oreo Cookies
- 2 Packs of yellow candy melt
- 1 Pack of black candy melts
- 1 Bag of mini pretzels
- Wilton candy eyes
- Wax paper
- Baking sheet or area to dry cookies
How to Make Bumble Bee Cookies
To make these bumble bee cookies start by gathering all of your supplies together. Line a baking sheet with some wax paper.
I also recommend setting up a cookie drying rack if you have one. It’ll allow your wings to dry better.
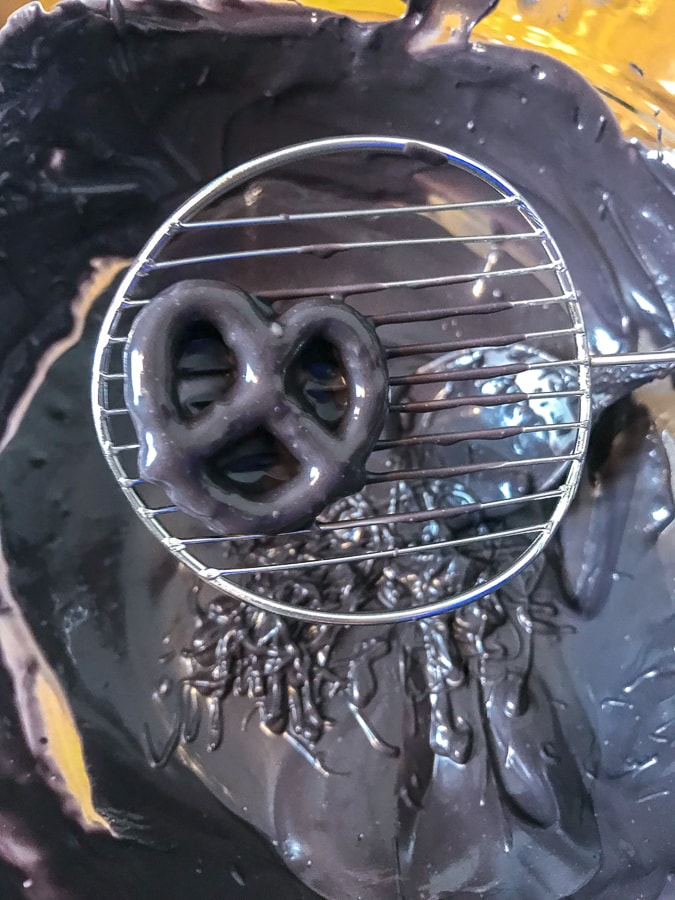
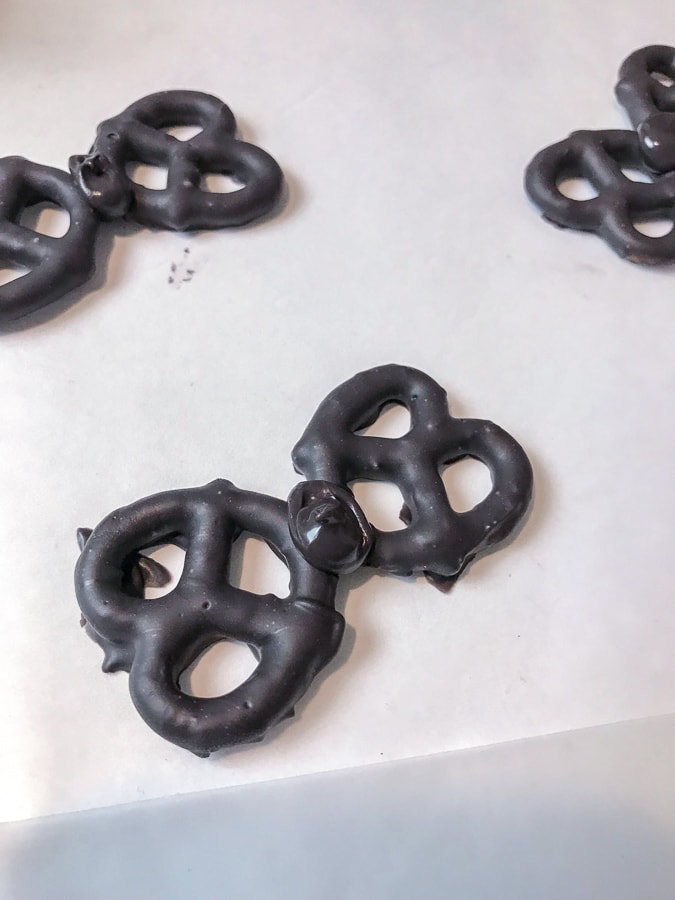
Melt your black candy melts according to the directions on the package. Each brand is different, so be sure to check their recommendations.
Dip each pretzel into your black melted candy. Place on your cookie drying rack to allow the excess to drip off before placing on your wax paper to allow to dry.
You can also just allow the dipped pretzels to drip while holding on a fork before transferring to your wax paper.
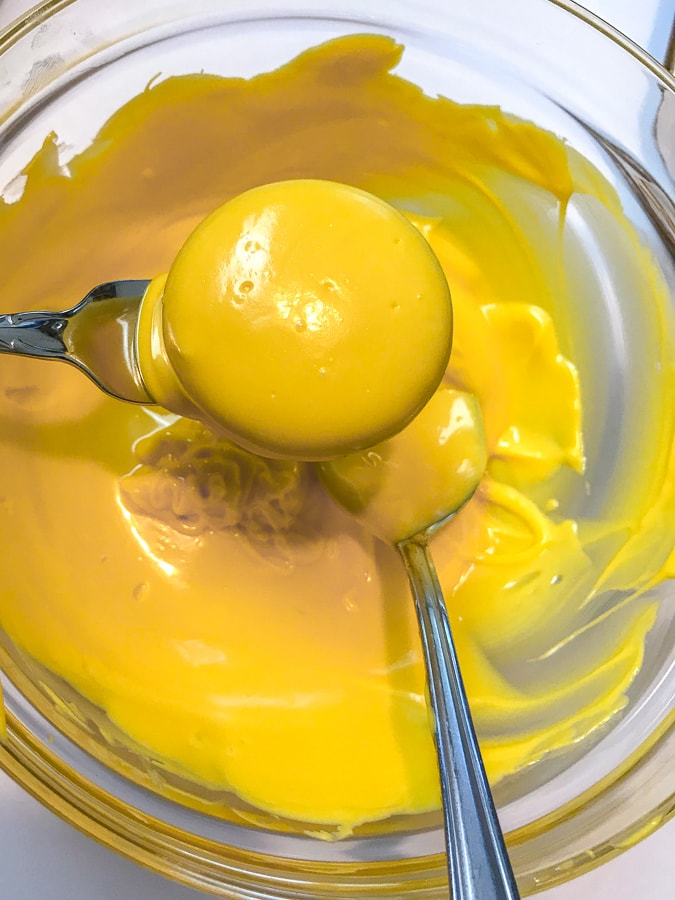
Once you have enough wings for your cookies (you’ll need 2 pretzels per bee cookie) you can start melting your yellow candy melts.
Dip each cookie into the yellow melted candy. Remove the cookie and gently tap to the excess candy to drip back into the bowl.
If you get any air bubbles, you can pop them with a toothpick for a smoother cookie surface.
Place the cookie onto your wax paper to dry and allow to set completely doing the next step. You can pop them in the fridge for a few minutes if you’re in a hurry.
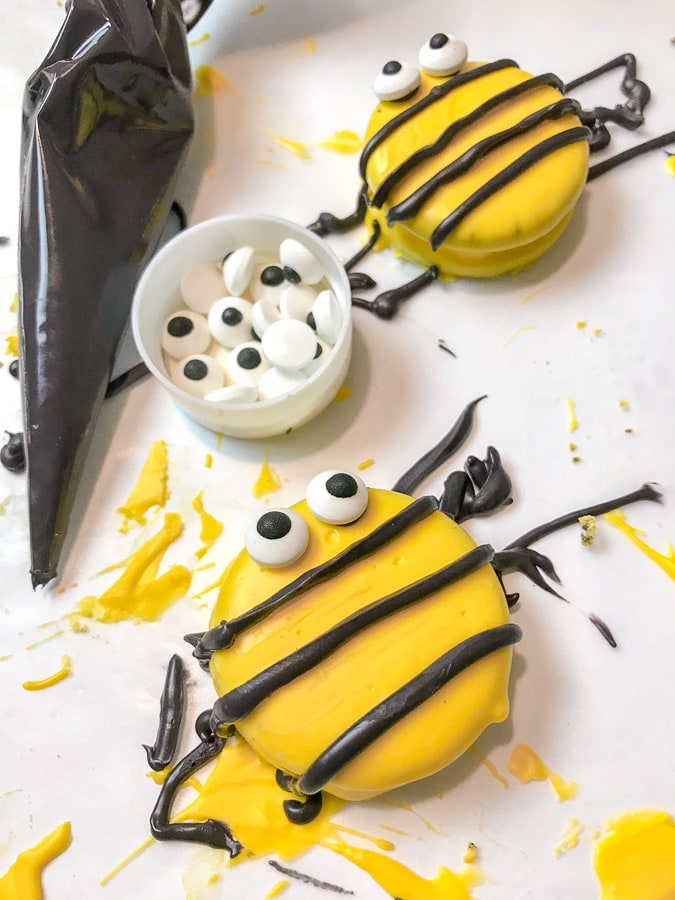
Once your yellow cookies are set, put some black melted candy into a piping bag or ziplock bag and snip the corner.
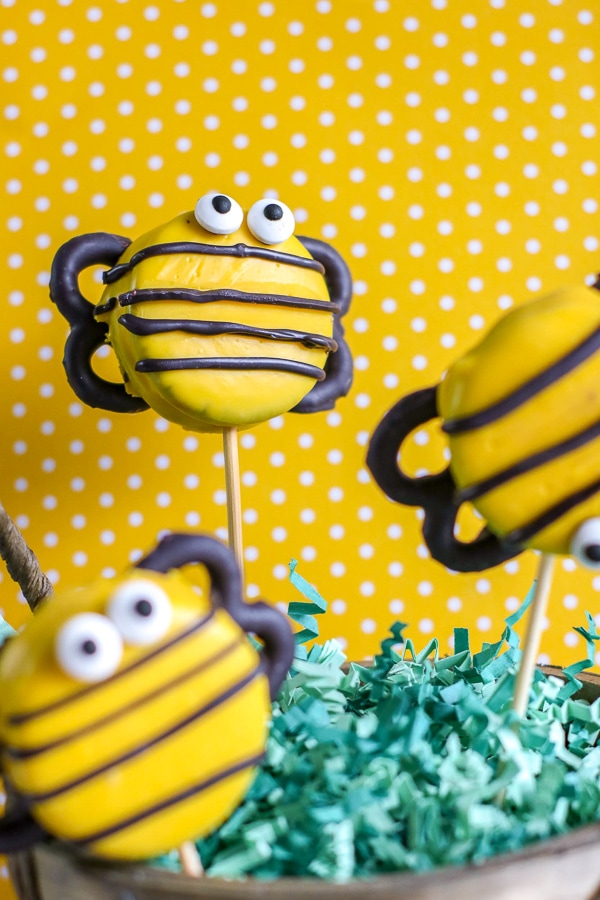
Create stripes across your yellow cookies, forming your bumble bees body. Then use the candy to “glue” 2 eyes at the top of each cookie. Do this to all of your cookies.
Create your bee wings by placing two of the pretzels curve to cure as shown below, and “gluing” them together with a generous amount of candy coating.
Press your yellow bee cookies onto the center of the wings, allowing the black candy melt to act as the glue.
Allow your cookies to set completely at room temperature or in the fridge.
These adorable bumble bee cookies are made with oreos, pretzels and candy melts. These would be super cute to serve at a bee themed party! When you melt your candy melts, if the candy is too thick to pour, you can add a teaspoon coconut oil or vegetable shortening and stir well. If it's still not smooth enough you can add up to a table spoon of coconut oil per bag of candy wafers to get a better consistency. Do not add water! It doesn't work. =) 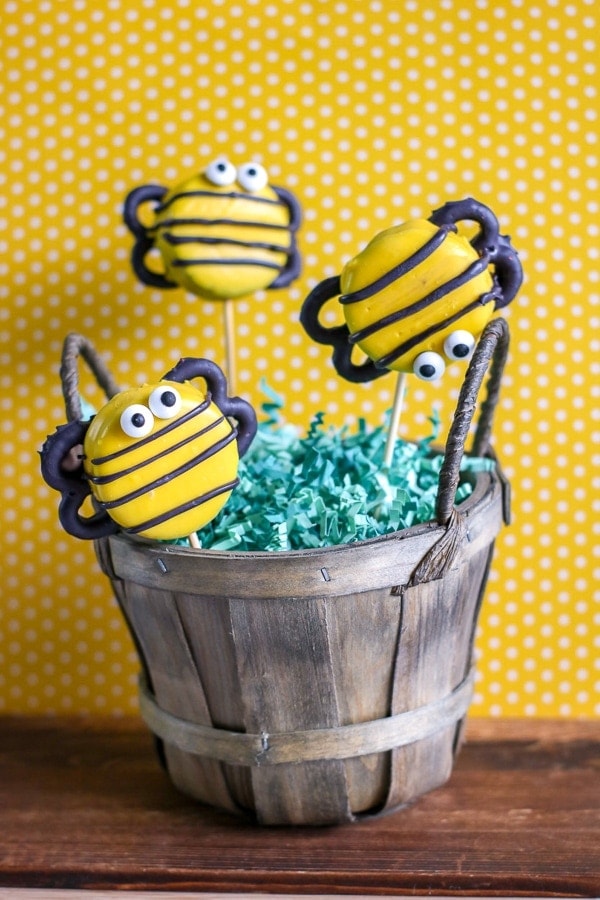
Bumble Bee Cookie Pops
Materials
Tools
Instructions
Notes
Bumble Bee Cookie Pops
These adorable bumble bee cookies are made with oreos, pretzels and candy melts. These would be super cute to serve at a bee themed party!
Materials
- 1 Pack of Oreos
- 2 Bags of yellow candy melts
- 1 Bag of black candy melts
- 1 Bag of mini pretzels
- Wilton candy eyes
Tools
- Wax paper
- Bowl to melt candy in
- Drying rack (optional)
Instructions
- Prep a drying area by lining a baking sheet with wax paper.
- Melt your black candy melts according to the instructions.
- Dip each mini pretzel into the black melted candy, allowing the excess to drip off before transferring to your wax paper.
- Melt your yellow candy melts according to the instructions.
- Dip your oreo cookies into the yellow melted candy, tapping lightly to drain of the excess back into your bowl.
- Allow them to dry completely on your wax paper.
- Once your cookies are completely set, transfer the rest of your melted black candy into a piping bag, or a ziplock bag with the corner cut off.
- Create stripes across each of your yellow cookies.
- Use the black melted candy to tack on eyes to each of your bumble bees.
- Allow your cookies to set.
- Arrange your candy coated pretzels in pairs to create wing shapes for your bee cookies. Apply a generous amount of melted black candy to where the pretzels meet, "gluing" them together.
- Press your bee cookies into the still melted centers of the wings, attaching them together.
- Gently press your sticks into your Oreo cookies to create Oreo pop bees.
- Store in an airtight container until ready to serve.
Notes
When you melt your candy melts, if the candy is too thick to pour, you can add a teaspoon coconut oil or vegetable shortening and stir well. If it's still not smooth enough you can add up to a table spoon of coconut oil per bag of candy wafers to get a better consistency.
Do not add water! It doesn't work. =)