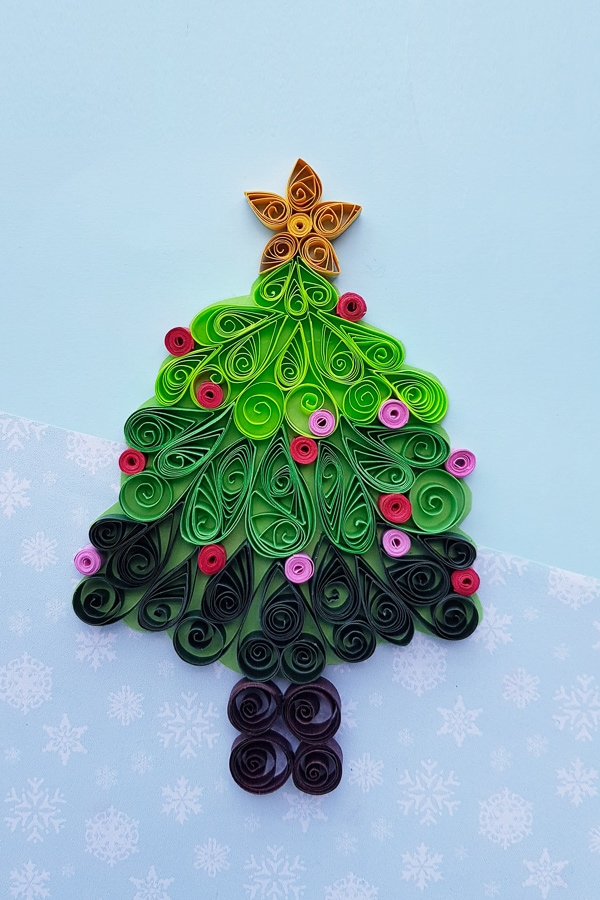
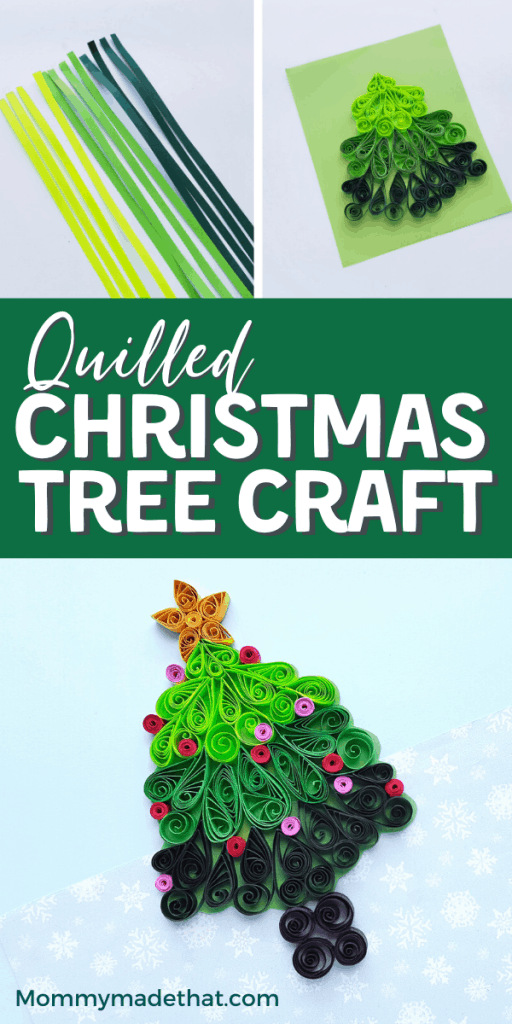
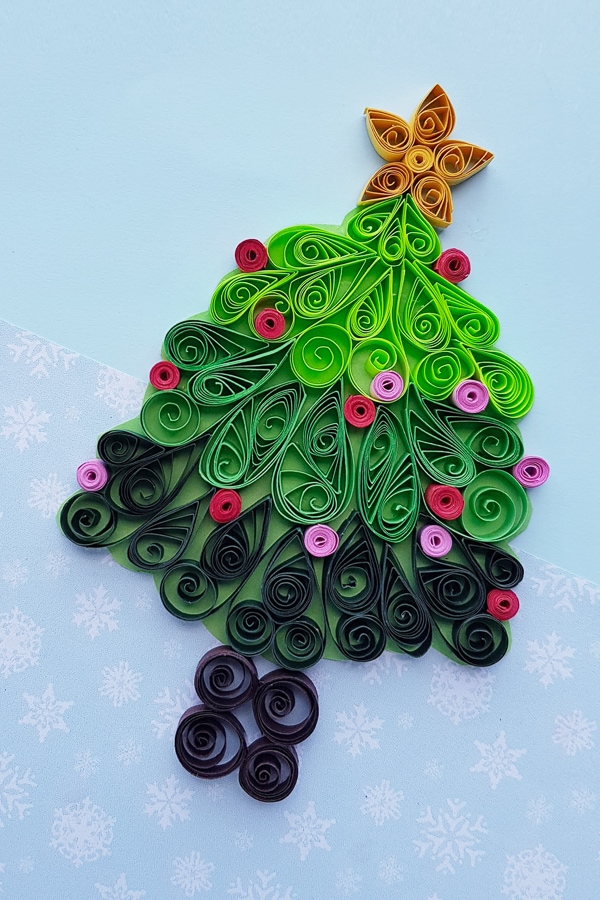
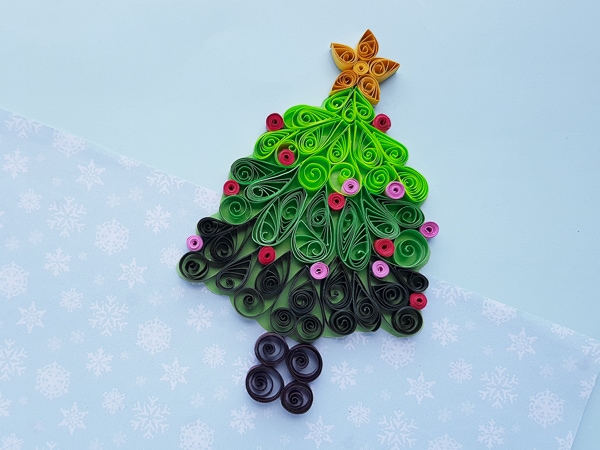
Cute DIY Quilled Christmas Tree


This adorable little quilled Christmas tree is a fantastic beginner’s quilling project. It looks complicated, but it’s not! It’s a lot of fun, and would look wonderful as a Christmas card design.
We’ve been making quite a few fun Christmas tree crafts lately! Like our felt Christmas tree ornaments and our pipe cleaner Christmas tree’s.
Today’s tutorial is a fun paper quilling Christmas craft!
We are showing you how to make this super cute, and easier than it looks, quilled Christmas tree.
This makes a fun paper craft with impressive results. It would also look awesome has a homemade Christmas card.
It could also make a really cute handmade ornament.
No matter how you use it, I can guarantee it’ll look great.
Just follow along with our step by step tutorial so that you can make a few quilled trees of your own.
This post may contain affiliate links. This means if you click a link and make a purchase, we may receive a small commission. You can read our full disclosure here.
Supplies Needed to Quill a Christmas Tree
To make these adorable little quilled Christmas tree, you’ll need the following materials and supplies:
- Paper quilling strips
- Green colored craft paper
- Slotted quilling tool
- Pencil
- Scissors
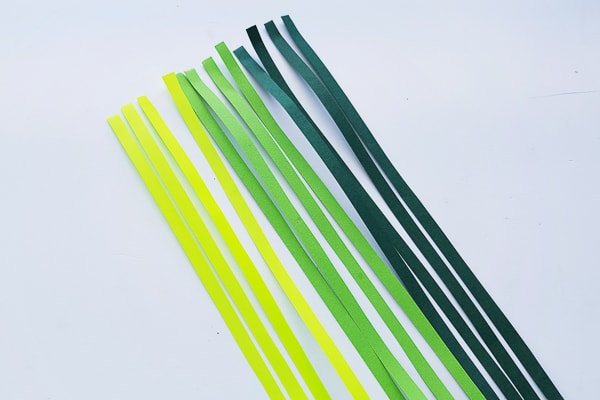
For the quilling strips, we used shades of green, black, and red and pink for the ornaments and yellow for the star topper.
How to Make a Quilled Christmas Tree
For our quilled Christmas tree we created our shapes and free styled our Christmas tree pattern. However, if you’d like you could grab one of our Christmas tree templates to help you shape your tree.
Start by grabbing your quilling strips. For the tree, choose 3 different shades of green.
We used a combo of 6-inch strips and 12-inch strips. The different lengths are for the various quilling shapes.
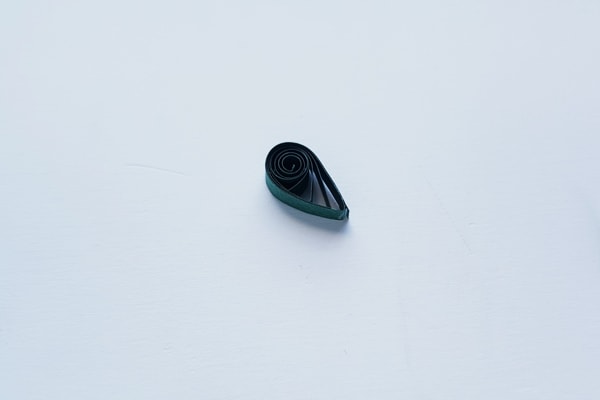
Next, take one of the strips and coil it using the slotted quilling tool.
Carefully remove the coiled strip from the tool and allow it loosen. It should look like the shape below.

Now, your going to turn the circular coil into a teardrop by squeezing on one point of the circle. Glue the open end to secure the shape.
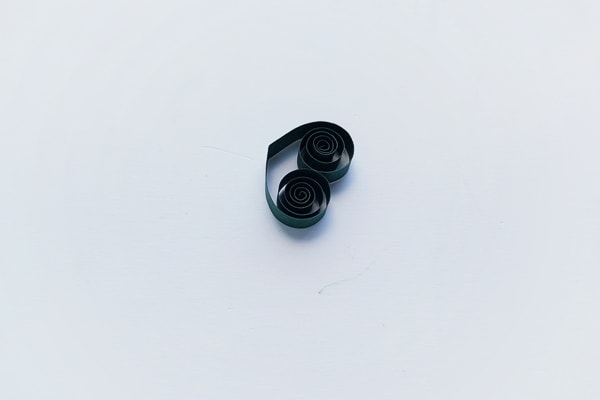
Next, grab one of the 12 inches strips and fold it into half.
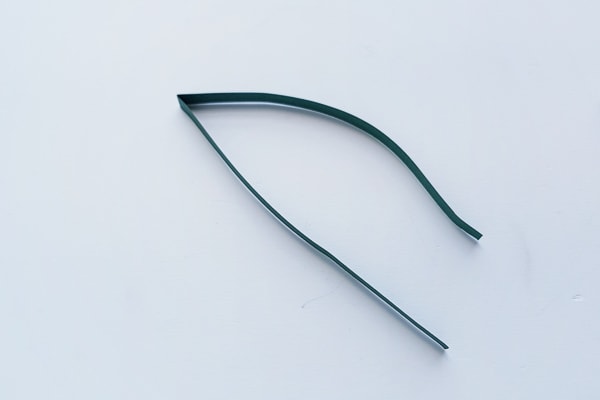
Then coil the 2 open ends of the folded strip.
Coil all the way to the closed-end (near the half fold part).
This will form a heart shape as shown below.
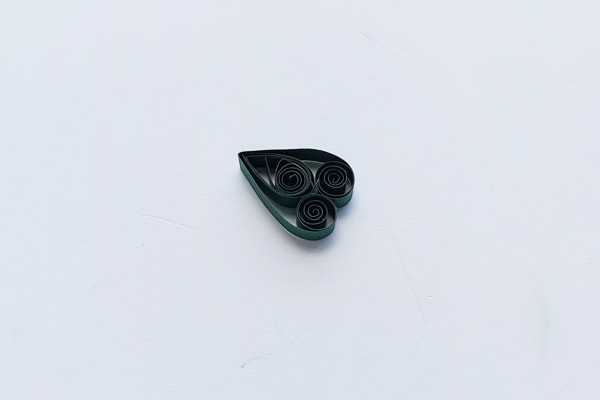
For the next step, you are going to grab the tear drop shape you made earlier, and then place it inside of the heart shape.
You’ll want the point of the tear drop to nestle into the point of the heart, like in this photo.
Now grab one of the 6 inch long strips and coil the whole strip from one end to form a twirl shape.
Then make another teardrop shape in the same color.
Now glue that tear drop shape, onto the straight end of the coild to form a “half heart” looking shape.
For the rest of the tree you’ll want to create lots of the following shapes:
- Teardrops
- Heart shapes with teardrops inside
- Teardrop with a twirl attached
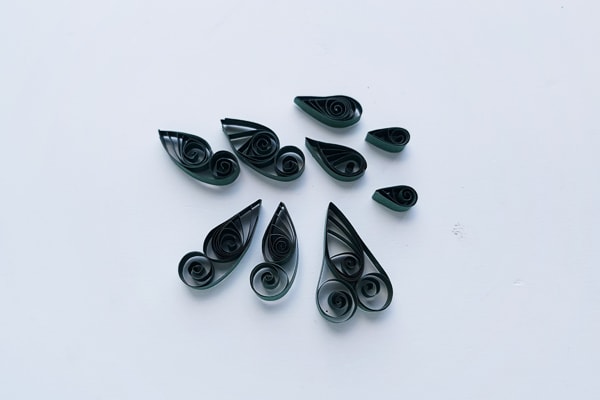
Continue making more shapes from each of your three green shades of quilling paper.
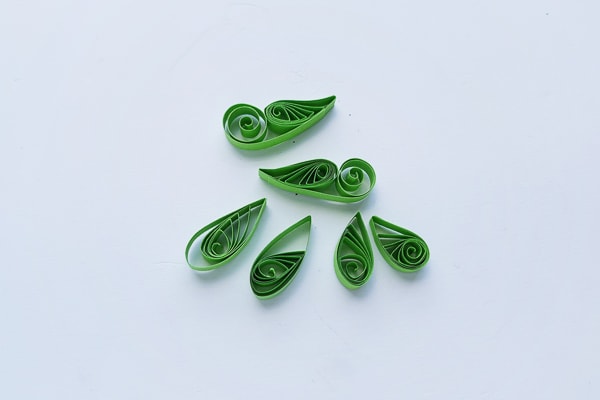
Now grab your green colored craft paper. This will be the backing of the tree and give your quilled Christmas tree a nice sturdy base.

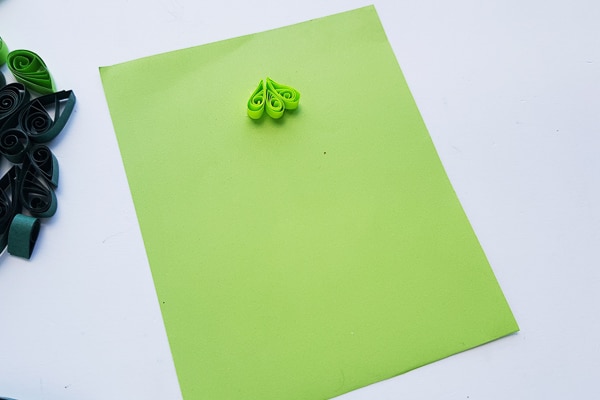
To start assembling your quilled Christmas tree, start at the very top of the tree.
Grab 3 of the small teardrop shapes and attach them on the top side of the paper, by keeping the pointy ends of the shape facing upward, creating a point at the top of the tree.
We simply added a few thin strips of glue to attach the quilling shapes to the paper.
Like this:
Continue attaching the quilled shapes downward, by keeping a general tree shape in mind.
For the next layer of the tree, we attached a heart shape with a teardrop to the middle, teardrops with twirls attached on both sides and on the 2 outer sides we attached 2 more teardrops.

Now grab the next shade of green shapes to create the trees third layer.
Glue the quilled shapes downward, creating a wider layer than the previous one.
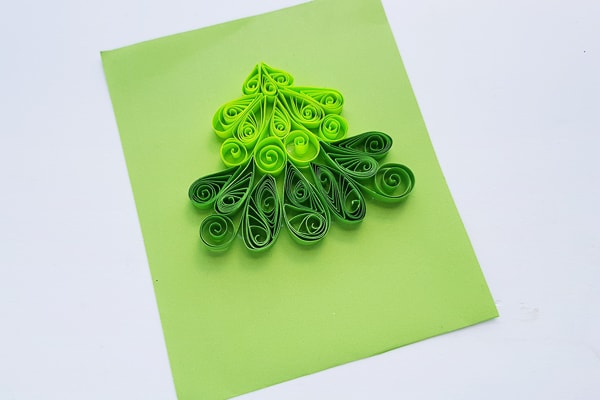
For the fourth layer of the tree we used darkest colored quilled shapes. You can keep adding more layers if you like.
Play around with the quilling shapes to form patterns you like, and then transfer the shape and glue them down to for the rest of the Christmas tree.
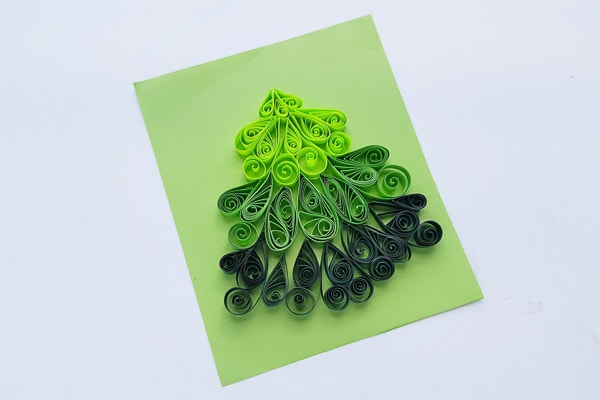
Now you can cut around your Christmas tree so that it’s no longer attached to the green paper.
Or you can leave it on the paper as a pretty background for a Christmas card.
Then quill a 5 point star pattern with yellow quilling strips. We used 5 tear drop shapes glued to a coil shape.
Then attach it to the top of your quilled tree.
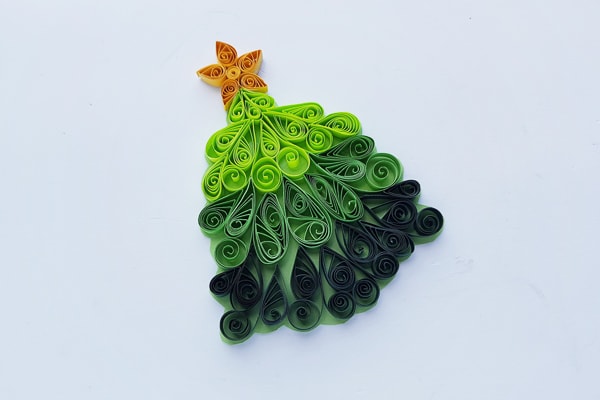
Finally, quill four loose coils in black or brown quilling strips. Attach them to the bottom of the tree to form a trunk.
Then you can use any color you like to form tight coils and create Christmas tree ornaments.
Simply nestle them into the tree where there are larger gaps and openings.
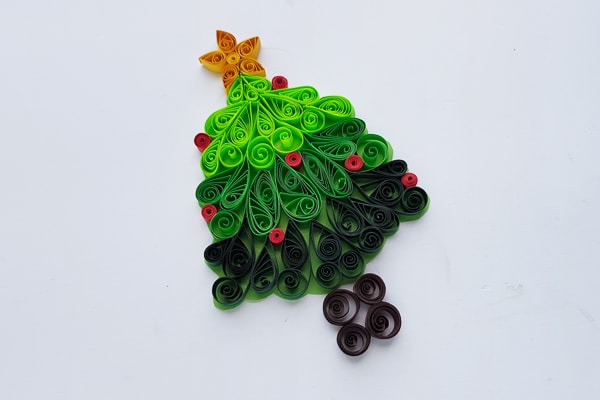
Isn’t it cute?
Now your paper quilled Christmas tree is all finished!
You can use it to decorate a Christmas card, hang it as an ornament, or just prop it up for decoration.