
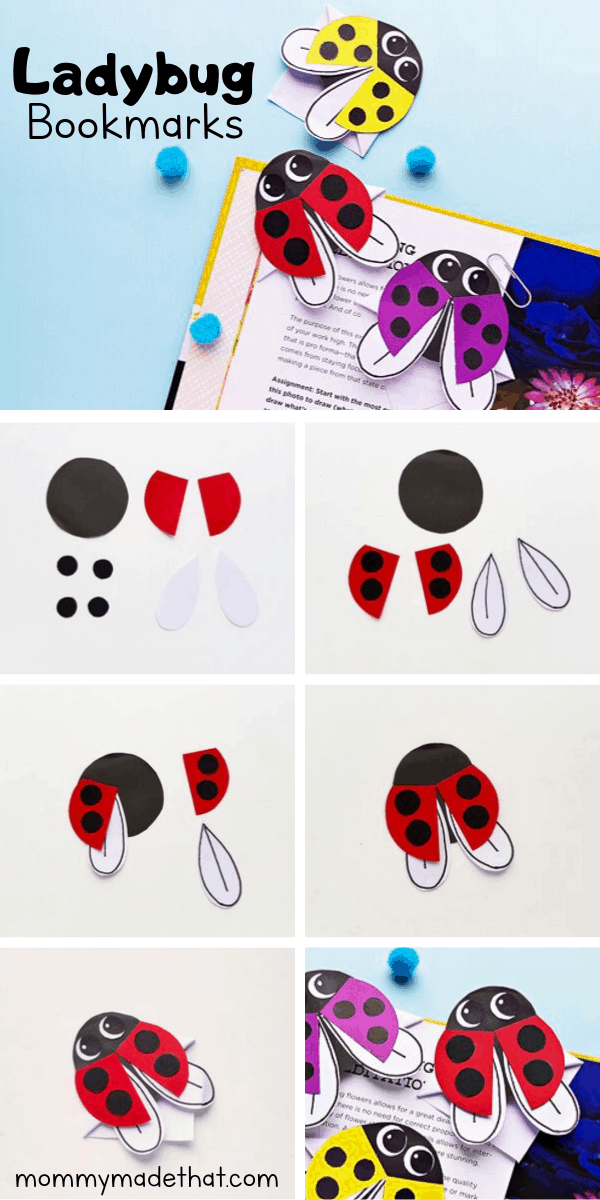
DIY Ladybug Bookmarks
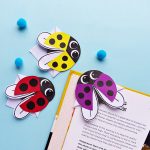
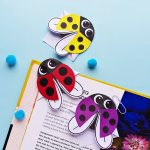
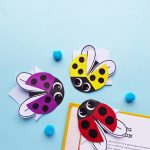
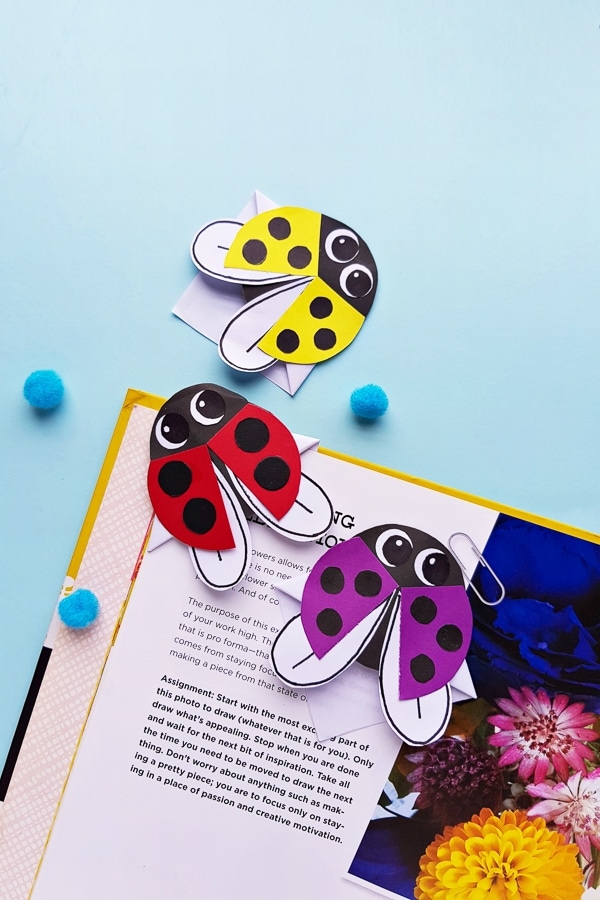
Today we have an adorable ladybug bookmark craft! These ladybugs are so stinkin cute and make excellent corner bookmarks, especially for some summer reading.
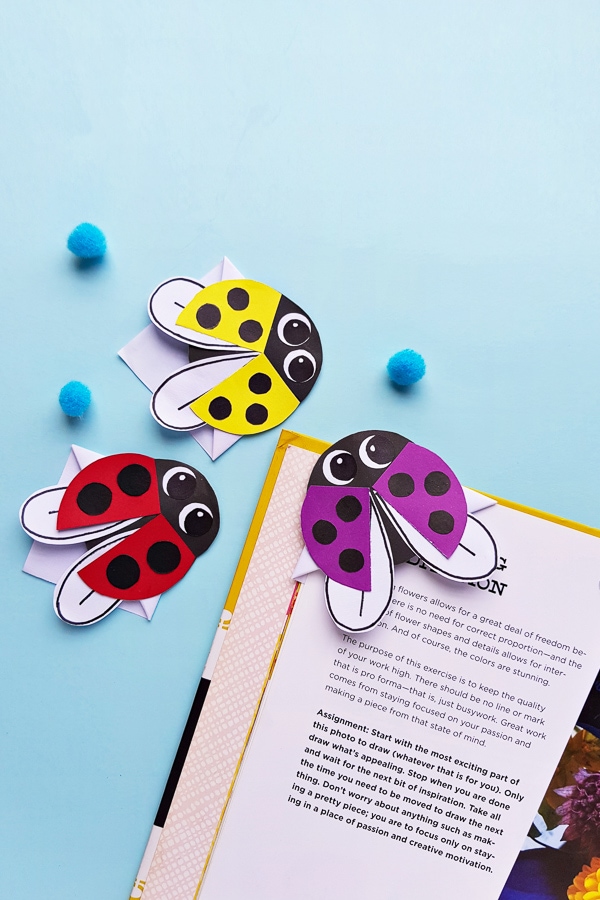
These ladybug bookmarks are so lively and feel as they are about to fly right off of your book!
This adorable spring craft has been one of our favorites so far.
The magic is definitely in the double-layered wings.
This ladybug craft is easy enough, especially without free printable ladybug bookmark template.
Honestly, the trickiest part is figuring out how to fold the corner bookmark.
But just like all of our other cute bug crafts we’ll show you how to make these super cute ladybug bookmarks in this step by step tutorial.
And if you like these, make sure to check out our bumble bee bookmarks too!
These DIY bookmarks for kids make for a fabulous summer craft.
This post may contain affiliate lines. This means if you click a link, we may earn a comission at no cost to you. You can read our full disclosure here.
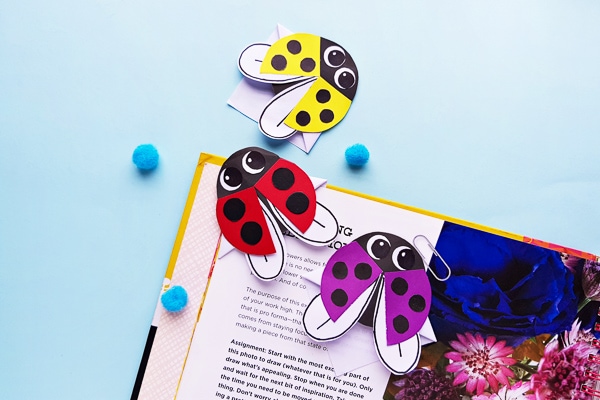
Table of Contents
Supplies Needed for Ladybug Bookmarks
For this ladybug bookmark craft, you are going to need the following supplies:
- Colored craft papers
- Pencil
- Scissors
- Black Sharpie
When choosing colors for your craft papers, have fun with your selections!
We used black and white for the base, and red, yellow and purple for the colored part of the ladybug wings.
I know ladybugs are typically red, but I think the other colors add such a fun twist, especially when they are all together.
How to make Ladybug Bookmarks
This ladybug bookmark tutorial is divided into 2 parts.
The first will be making your corner bookmarks from plain paper.
The second part of the tutorial will focus on making the paper ladybugs. Let’s get started!
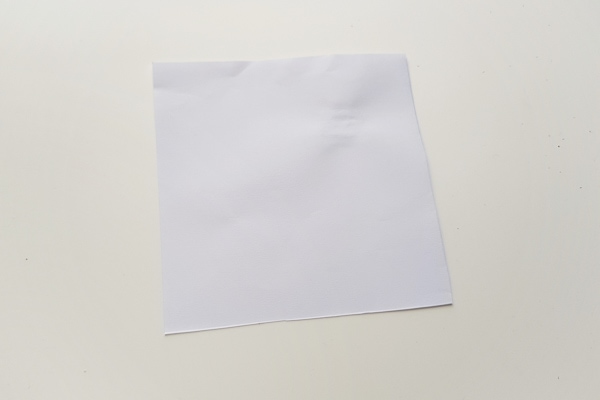
Step 1: Grab a Square Piece of Paper
Start by preparing a square piece of paper in the color you want the base of your corner bookmark to be.
We used plain white paper for our ladybug bookmarks, but don’t be afraid of using other colors!
Cut the paper into a 10in by 10in square, although as small as 8in by 8in would work too.
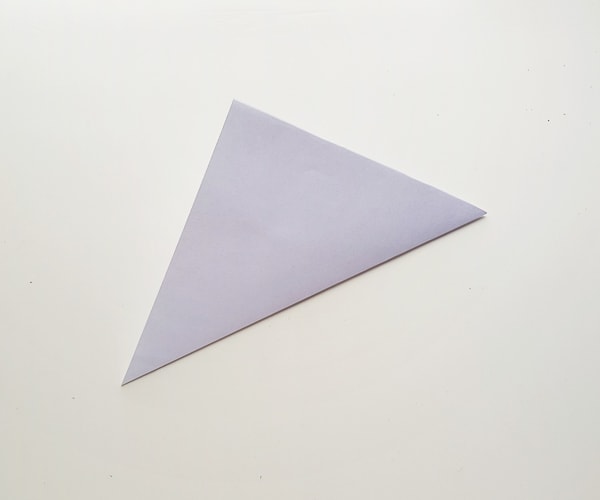
Step 2: Fold the Bookmark Base in Half
Grab your square piece of paper and fold in half diagonally so that it’s touching corner to corner.
You’ll end up with double-layered triangle like shown below.
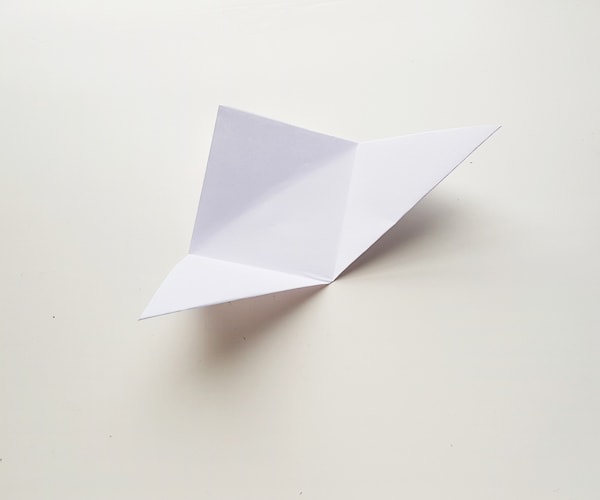
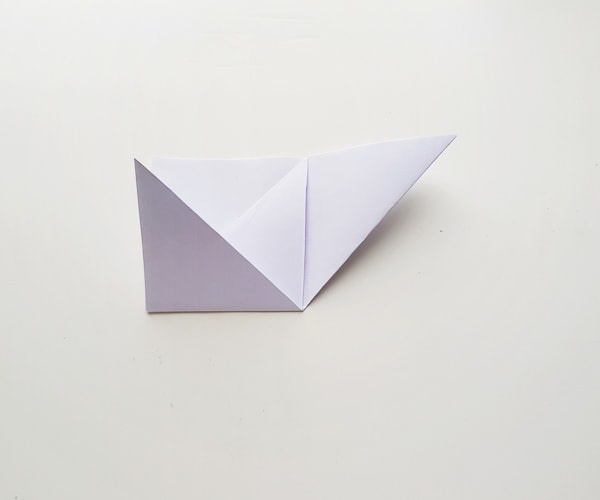
Step 3: Folding the Corners
Next, fold the bottom left and right corners of the triangle to the top corner and unfold them again.
Also, fold the top half of the triangle down so that the tip touches the bottom edge.
When unfolded it should ook like the photo below.
Step 4: Fold the flap down
Now fold just the top layer of the top edge of the triangle and fold it again toward the bottom of the triangle.
You can see what I mean in the photo.

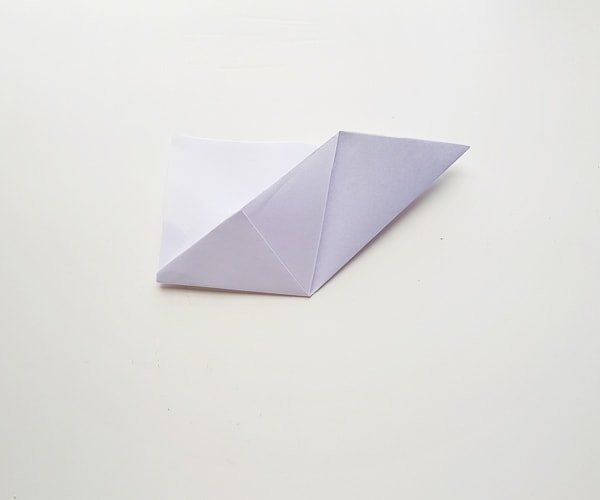
Step 5: Folding the edges
Next, fold up the bottom left corner completely toward the top corner.
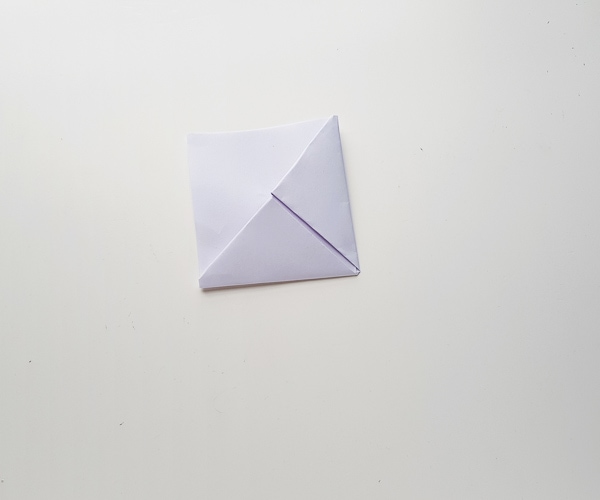
Step 6: Creating the Bookmark Pocket
Fold that same left piece in half and tuck into the layer formed in step 5.
This will start creating the pocket of your ladybug bookmark.
Step 7: Repeat to Complete the Corner Bookmark
Now fold up and fold in the other side of the corner to complete your folded bookmark.
Making the Paper Ladybugs
Now that the corner bookmark part is completed, you can make the paper ladybug part of the bookmark.
Make sure to head to our grab the template to make the ladybugs at the end of the tutorial.
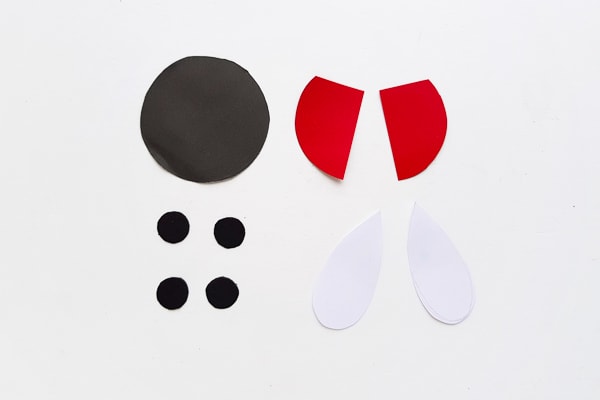
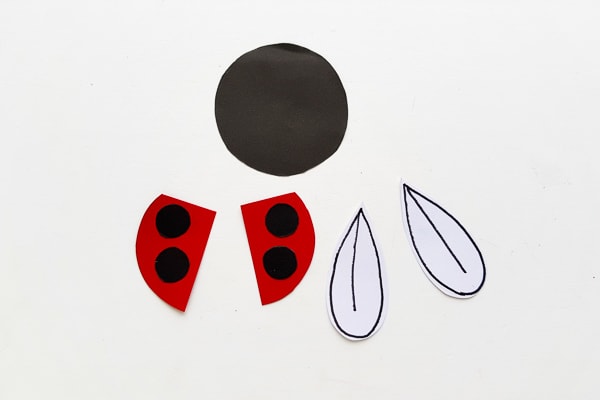
Step 1: Cut out the Ladybug bookmark printable template pieces
First, print and cut out the ladybug body pieces from the ladybug bookmark printable template.
Select black craft paper for the circles (both big and small), white for the teardrop-shaped wing patterns and any color you prefer for the semi-circular body patterns.
Trace the ladybug body pieces onto the selected, coordinating papers and cut them out using a pair of scissors.
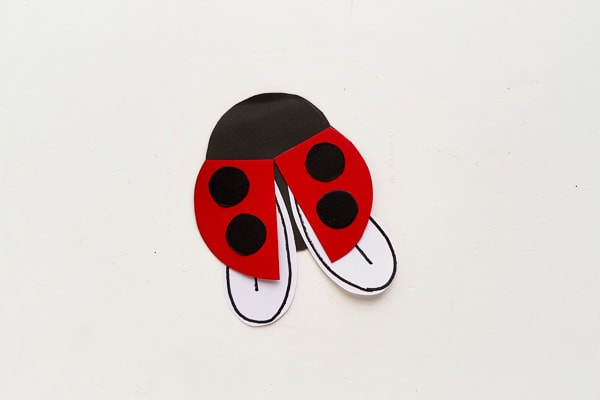
Step 2: Detailing the Ladybug Wings
Next, use a thin black sharpie to trace a thin border around the teardrop-shaped wings.
Then make a line going down the center of the wings.
Attach the small circle cutouts on the semi-circular patterns.
Can you see the ladybug already?
Step 3: Attaching the Ladybug Pieces
Take a teardrop wing piece and secure it onto the big circle.
Place the pointy side somewhat near the center of the big circle.
Now, attach any one of the colorful semi-circular patterns over the previously attached teardrop pattern.
Now your ladybug has one set of wings!

Step 4: Repeat on the Other Side
Now repeat the step 3 on the otherside of your ladybugs body, creating the second set of wings.
Step 5: Now, attach the googly eyes on the upper part of the black circle (the ladybugs head.)
Allow the glue to dry completely.
We didn’t have googly eyes on hand, so we just created makeshift eyes from some white paper.

Step 6: Glue the Ladybug to the Bookmark Corner Piece
Now attach your finished paper ladybug to the origami corner bookmark you previously made.
Allow the glue to dry fully before using your ladybug bookmark!!

Grab the Ladybug Templates
To grab the free printable template, put your email in the box below. We’ll send the printable straight to your inbox, along with some other goodies.
These templates are for personal and classroom use only, please. Not for commercial use. Thank you!


I like your ladybug bookmarks very much! Thank you for the free printable 🙂