Super Cute Paper Bag Turkey Craft
Today we are making a paper bag turkey craft! We are actually creating this little guy completely from scratch.
We’ll show you how to make a small paper bag and turn it into a turkey!
This is perfect for filling with crayons or treats and creating a place setting for the kid’s Thanksgiving table. It would pair perfectly with our printable Thanksgiving placemats.
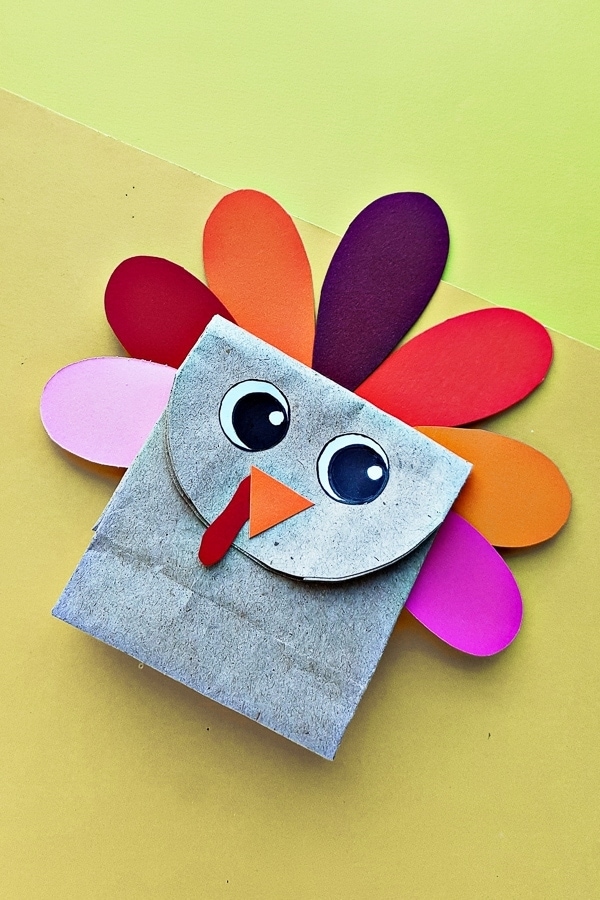
Isn’t this just such a cute turkey craft! Today’s tutorial is a paper bag turkey!
This is a great Thanksgiving craft for kids.
We will show you how to make the actual paper bag too out of a piece of paper. Its an easy craft for kids, but tons of fun.
You can then stuff this little turkey with fun treats and goodies to give out on thanksgiving.
Of course, if you have a small paper bag already made, that will totally work too!
Simply skip the part about making the bag.
After making this craft, make sure to check out our other Thanksgiving crafts like our popsicle stick turkey. and our turkey made from a toilet paper roll.
Table of Contents
Supplies Needed for this Turkey Paper Bag Craft
The supplies you need for this little turkey craft are pretty basic:
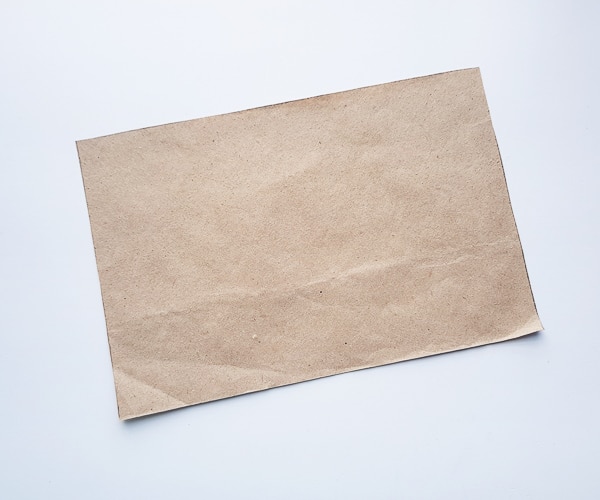
Brown Paper: A large sheet of brown paper will act as both the turkey’s body and will be used to create the paper bag. If you have a brown paper lunch bag, you can use that instead.
Colored Craft Paper: You can use colored construction paper or the craft paper you get from the craft store.
We choose a variety of colors including oranges, reds, yellows and even a few pinks and purples for an extra pop of color in his tail.
Pencil: To help trace out the shapes of the turkey’s face and tail on to the craft paper.
Scissors: To cut out all the pieces
Craft glue: You can use a glue stick, Elmer’s glue or even a hot glue gun (with adult supervision.) Honestly the glue stick worked fantastically for this craft.
How to Make the Brown Paper Bag
Let’s start by making the brown paper bag that will be the turkey’s body.
Step 1: The First Cut
Start by grabbing the sheet of brown paper.
Cut out a rectangular piece. We cut ours to 8.5in by 6in.
Cutting out a piece of a larger paper bag is perfect for this.
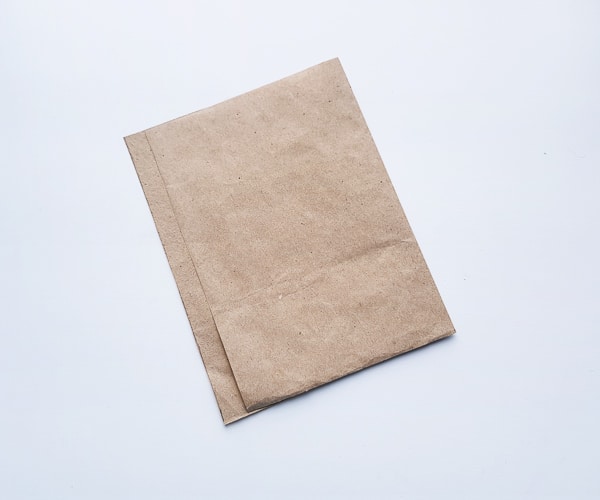
Step 2: Fold the Paper
Fold the paper in half, but leave one edge with a half inch width overlap, like shown below.
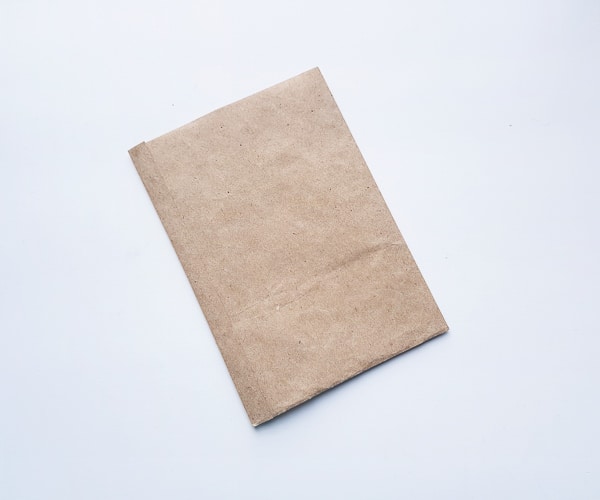
Step 3: Glue the Bag
Apply a strip of glue along the overlaped piece and fold inside, joining the two pieces together to close them.
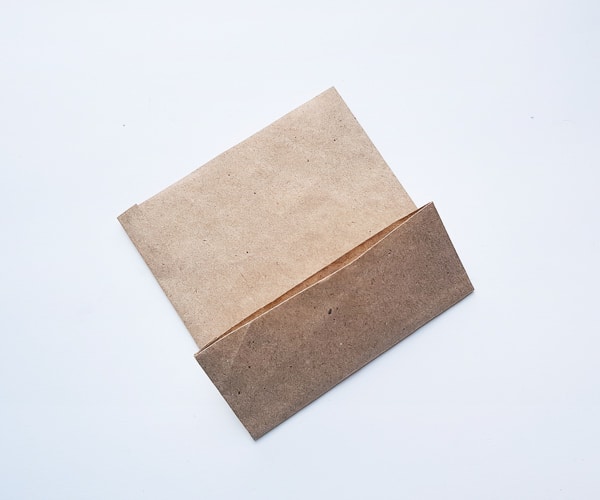
Step 4: Forming the Bottom of the Bag
Fold up the bottom 2 inches of the paper form, where we’ll start to form the bottom of the bag.
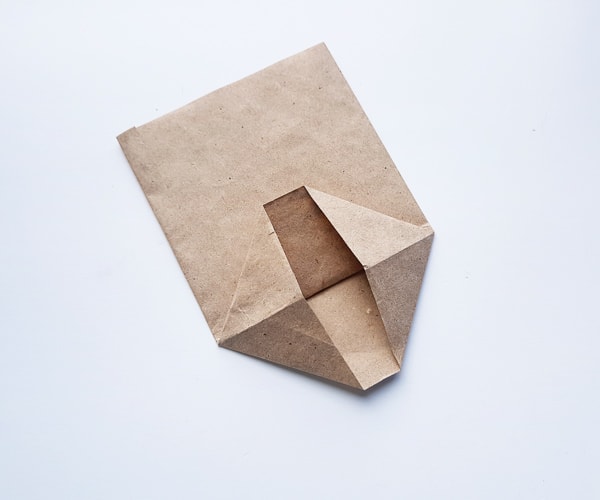
Step 5: Fold the Bottom
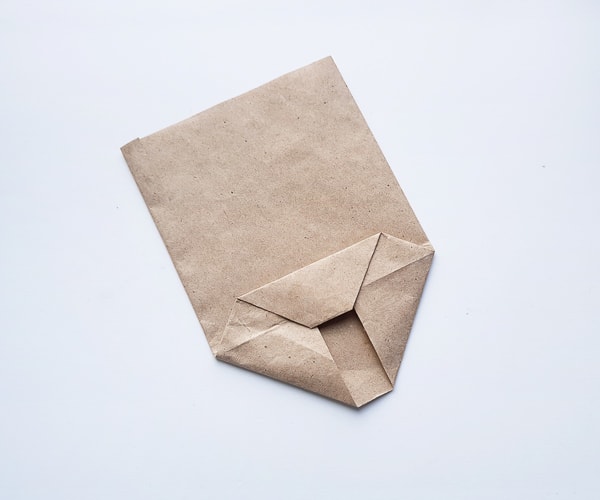
Working on a flat surface, open the bottom fold from inside. This will create triangles on both sides of the closed end.
It should look similar to the image below.
Step 6: Fold Again
Now hold any one of the open sides of the bottom end. Fold it halfway through the bottom part like this:
See how it’s starting to look like a brown paper bag?
Step 7: Fold the Other Side
Similarly, fold the other side of the bottom open end. Make sure that it overlaps the previous fold.
Apply some glue to join the overlapped sides to secure the bottom end of the paper bag.

Step 8: Fold the Sides
After finishing the bottom of the bag, notice the 2 diamond/squares parts on both sides of the bottom.
Match and fold the opposite corners of the diamond/squares to make a perfect crease along the left and right side of the paper bag.
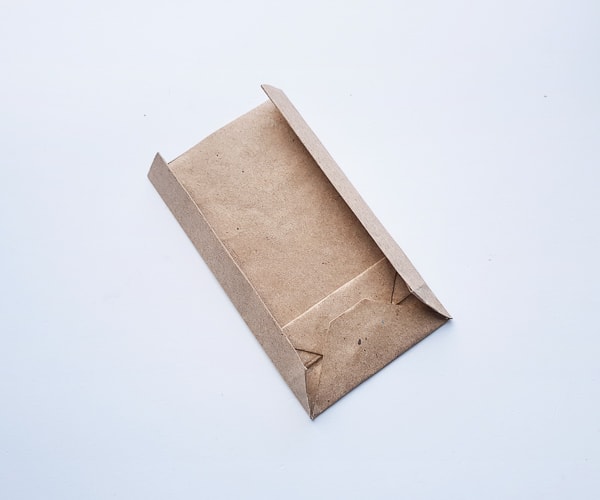
See how the corners match?
Step 9: Unfold
Unfold all the folds created previously except for the ones you glued down.

Step 10: Finish the Paper Bag
Now Fold the bottom and sides neatly to complete the bag.
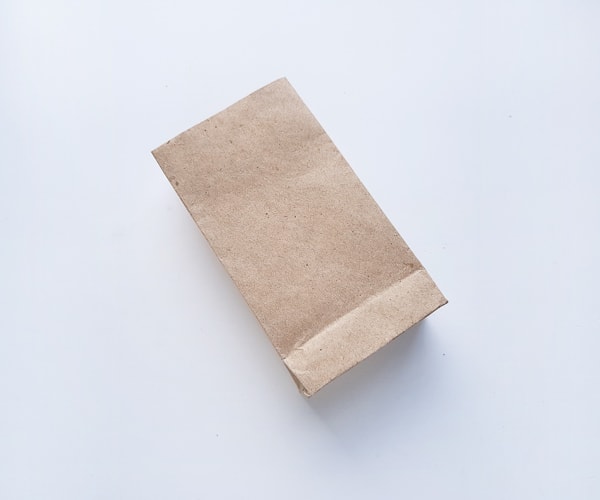
Now it’s looking just like a store-bought brown lunch bag.
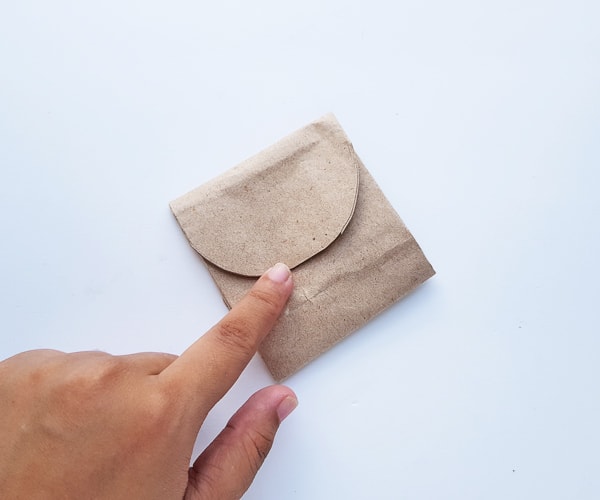
Step 11: Make the Turkeys Head
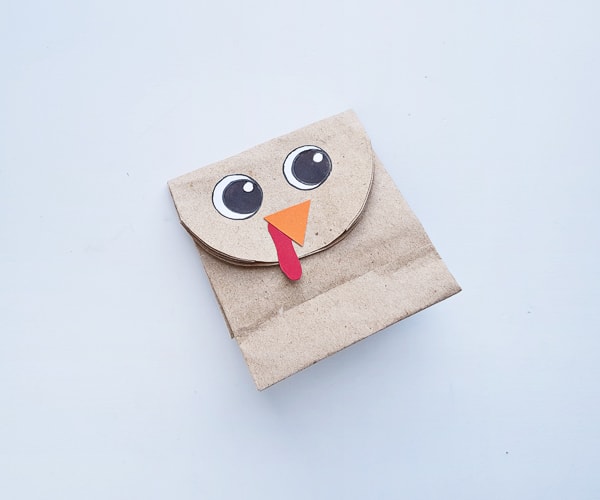
Now that your paper bag is complete. Fold the top part down and cut into a curved shape.
This will be your turkey’s head.
Step 12: Making the Turkey Feathers
Now you can start working on the turkey feathers.
Start by printing out our paper bag turkey craft template. You’ll find it at the end of the tutorial.
Then, using colored craft paper, cut out the tail feathers, along with the turkey’s waddle, beak, and eyes.
You could also use googly eyes instead if you have some you like.
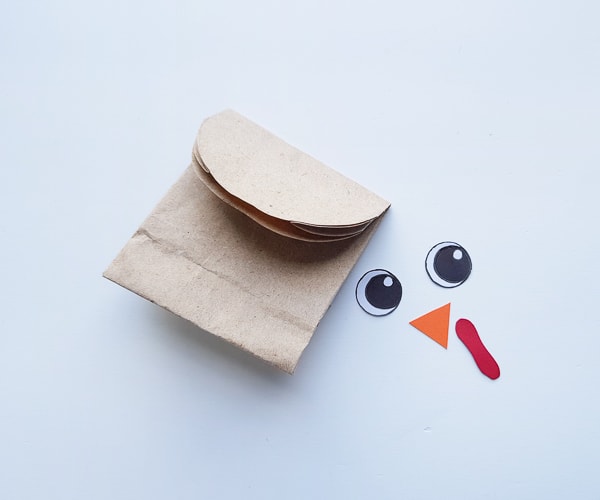
Step 13: Making the Turkey’s Face
Now you can attach the turkey’s eyes, beak and wattle on the folded curved part of the paper bag.
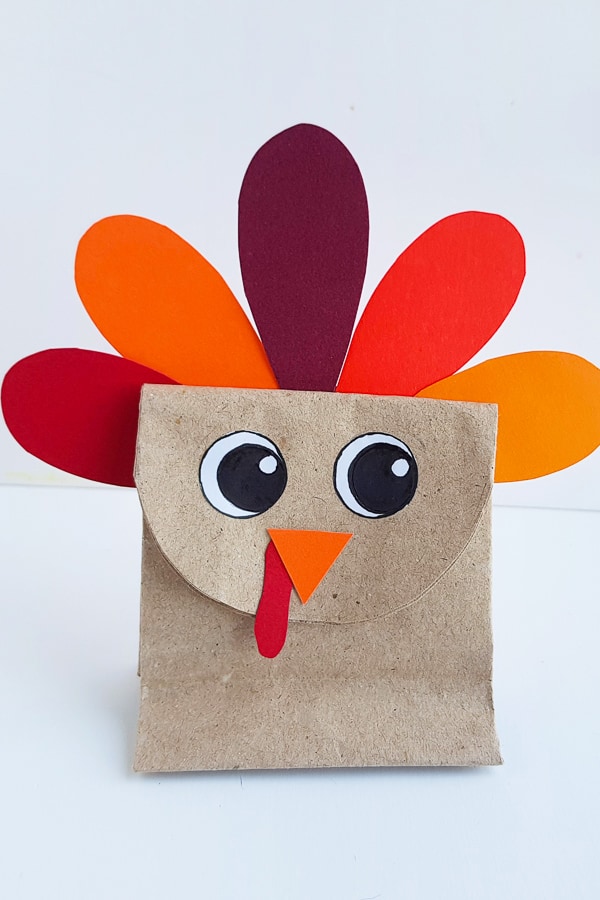
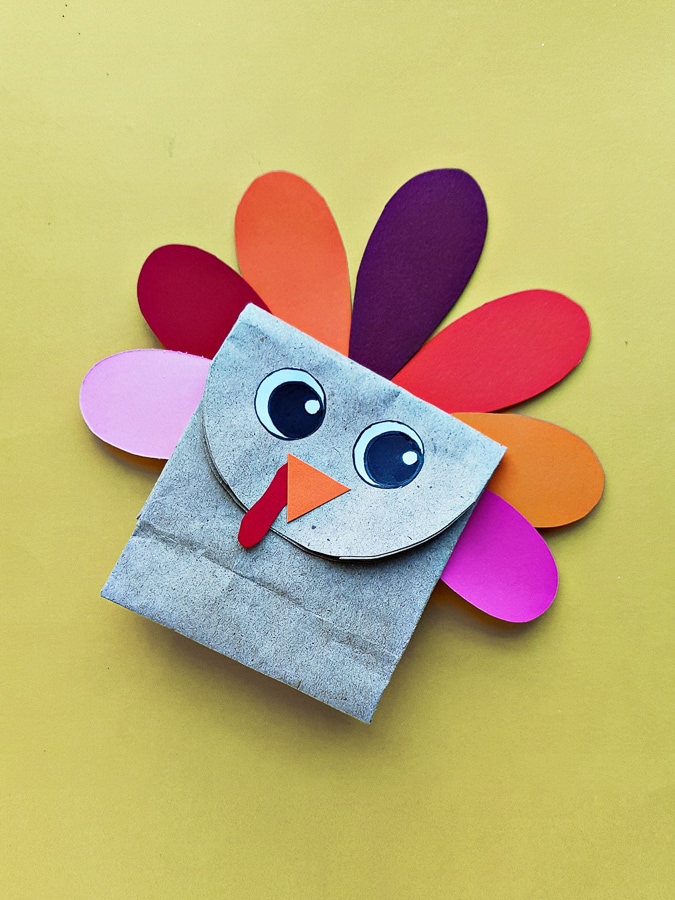
Step 14: Place the Tail Feathers on the Paper Bag Turkey
Now select which colored tail feathers you’d like to use for your turkey’s tail.
You can use fall colors like we did, or go crazy and have a rainbow tail, or any of your favorite combinations.

Step 15: Attach the Turkey Tails
Attach the tail feathers on the backside of the paper turkey bag to complete the craft.
Isn’t he super cute? I love the idea of filling the turkey full of crayons and placing on the kid’s Thanksgiving table as seat markers.
You could write each childs name on a bag, fill with crayons and add a Printable Thanksgiving activity mat.
I this year for Thanksgiving, we’ll make several of these little turkey’s and stuff them with crayons, a few treats and a possibly a folded up activity book for the kids thanksgiving dinner table.
Be sure to check out our disguise a turkey printable for more turkey fun!
Grab the Free Turkey Template
To grab the free printable turkey template, put your email in the box below. We’ll send it straight to your inbox!
This is for personal or classroom use only, please. Not for commercial use.