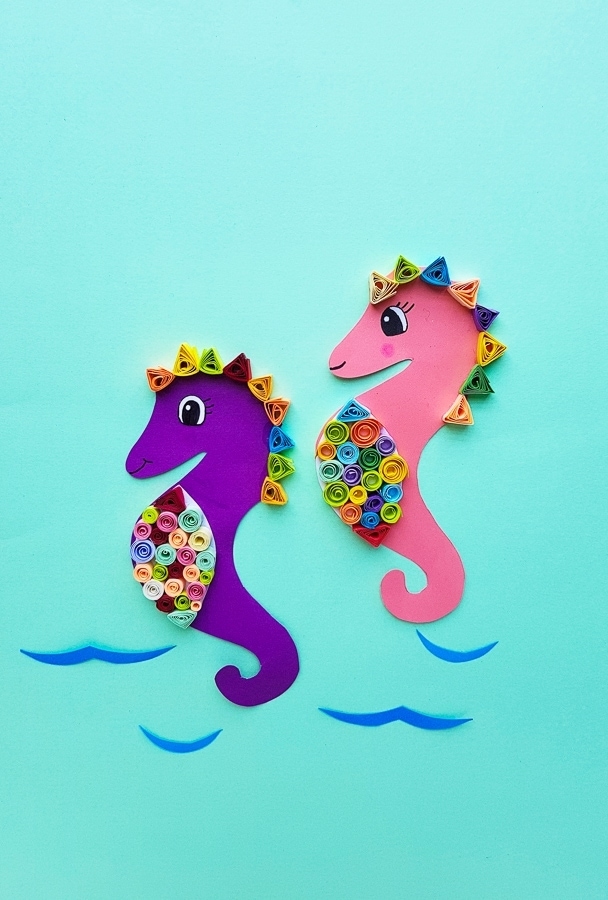
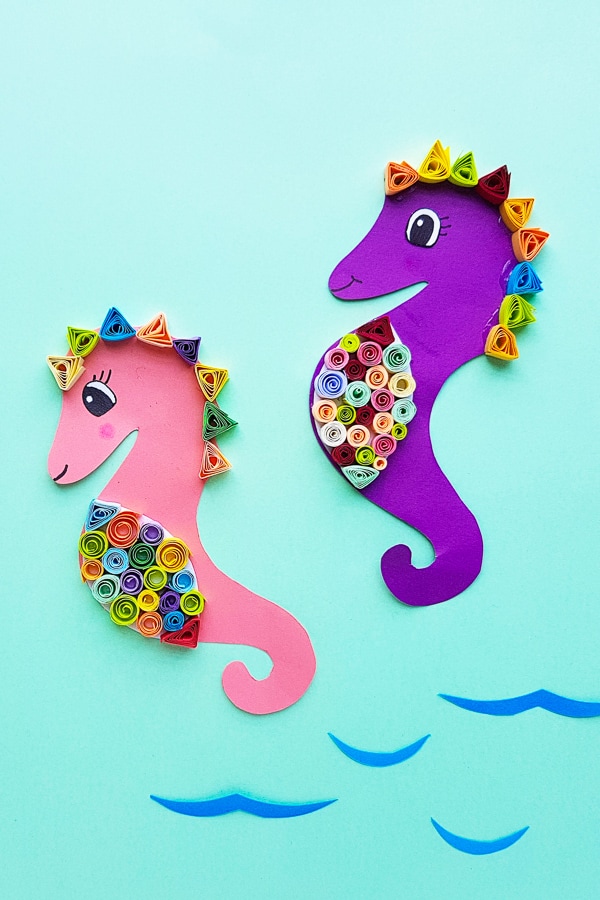
Quilled Seahorse Craft with Free Printable Template
Looking for a cool seahorse craft? We’ve got just the thing today. These pretty seahorse are completely made from paper, but come out so gorgeous!
We’ve got a fun ocean craft today! It’s a fun and easy kids craft idea.
We are quilling seahorses! These cute little guys are adorable and so much fun to make.
We’ve been wanting to experiment with quilling sea creatures for a while now. And this seahorse craft fits the bill!
Table of Contents
Supplies Used for this Quilled Seahorse
- Bright colored craft paper
- Quilling strips
- Slotted quilling tool
- Pencil
- Scissors
- Craft glue
How to Make Your Quilled Seahorse Craft
Now now that you have your supplies, it’s time to start crafting your seahorse.
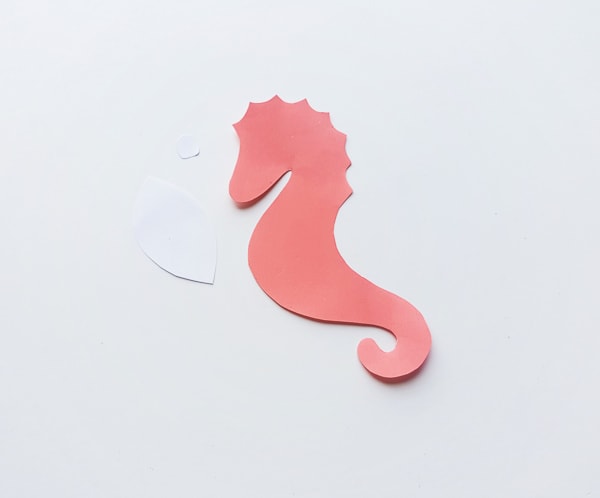
First, make sure you grab our free Seahorse craft template from our crafty resource library! Then grab a couple of pieces of brightly colored craft paper (or any color you like) and plain white paper.
Step 1: Gathering Your Craft Supplies
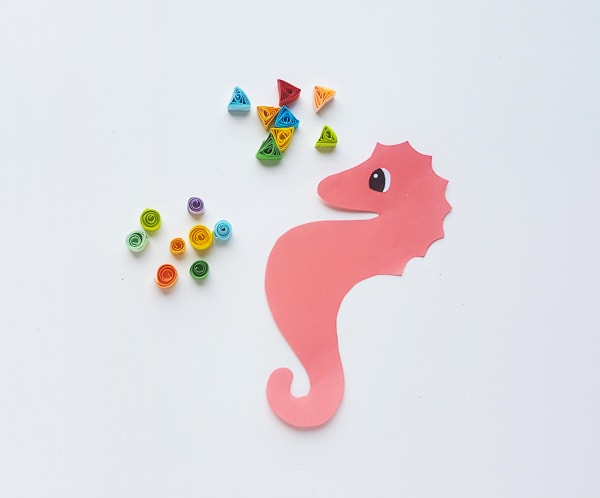
Cut out the pieces of your seahorse template. You should end up with a body piece, front belly area and an eye.
Trace the body piece of your seahorse onto the colored craft paper. Cut out and trace the belly and eyepiece from the plain white paper.
Step 2: Start Quilling
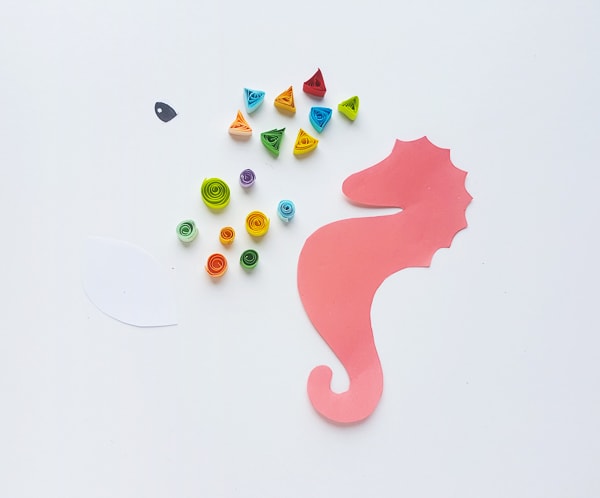
Using different colored quilling strips, loose coils and triangle shapes with them. To create the triangles, simple take a loose coil and pinch 3 of the sides.
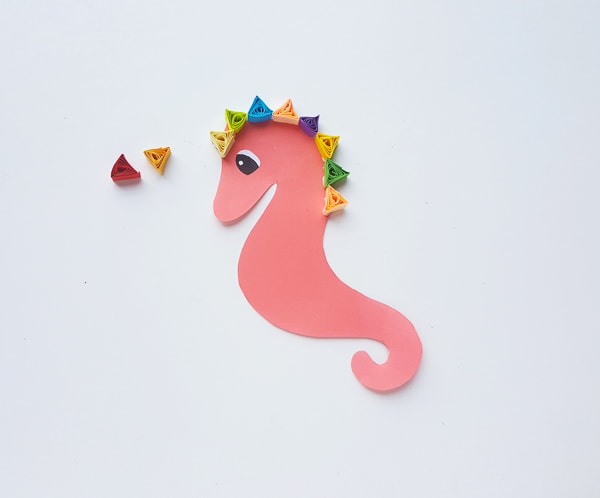
Step 3: Create Your Seahorses Eye
Take the eye cut-out piece from your template and fill in the pupil with a black sharpie or gel pen and glue it onto your seahorse.
Step 4: Create your Seahorse Spikes
Using the quilled triangle shapes, attach them along the spiked edge of your seahorse body. You can keep them all the same color, but we thought alternating colors looked fun!
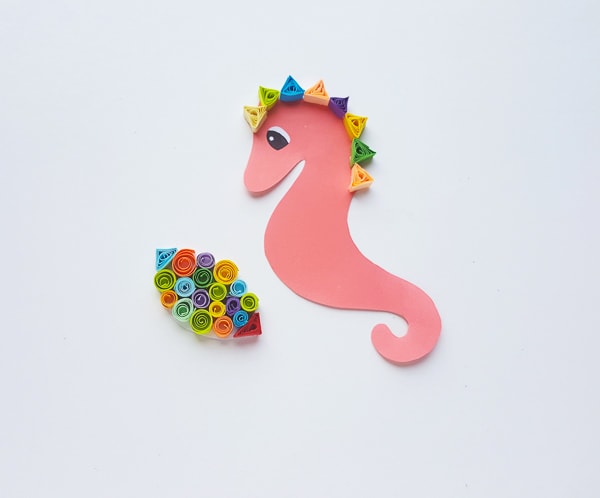
Step 5: Quill Your Seahorse’s Belly
Take your belly cut out piece and start filling it in with your quilled coils. You can also shape your coils to better fit your belly shape.
We attached a quilled triangle piece to the top and bottom of the belly to help it fill in better.
Step 6: Finish Your Seahorse
Once you’ve filled in the belly shape with your quilled coils, attach it to your seahorse’s body.
Fill in the details of your little guy (or gals) face with finishing touches. We added some eyelashes, a smile and a rosy cheek!
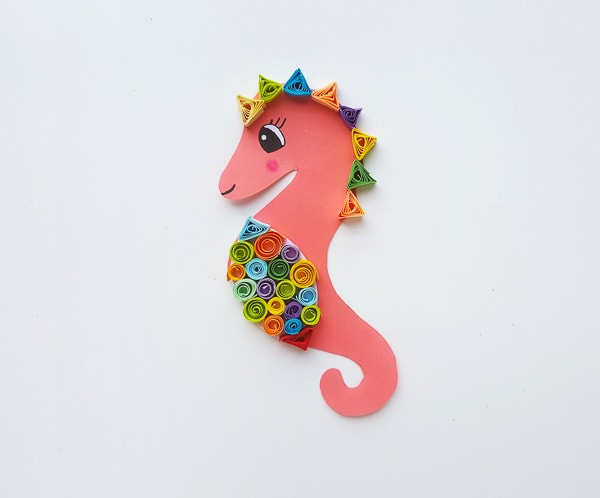
Make a couple little seahorses and you can have an awesome piece of quilled art to hang on your wall!

Quilled Seahorse Craft
This cute seahorse craft is made from quilling strips of paper to create a 3D piece of art.
Materials
- Colored craft paper
- Plain white paper
- Quilling strips
- Quilled Seahorse Template
Tools
- Scissors
- Pen
- Quilling tool
- Craft Glue
Instructions
- Trace and cut out your seahorse template pieces onto your colored craft paper and plain white paper. The body should be on colored paper and the belly and eye piece should be cut out on plain white paper.
- Quill several pieces of your quilling strips and shape into coils and triangle pieces.
- Cut out the eye piece, color in a pupil and attach to your seahorses face.
- Take a few of your quilled triangle pieces and attache on the spiked crown of your seahorse.
- Take several of your quilled coil pieces and fill in your belly piece. We used a triangle on the top and bottom of the belly so it filled in better.
- Once the belly piece is full, attach it to your seahorse. Add the finishing touches to your seahorses face, like a mouth, nose or eyelashes.
- Enjoy your finished piece of art.